WinPE: Add packages (Optional Components Reference)

ref:

https://msdn.microsoft.com/en-us/windows/hardware/commercialize/manufacture/desktop/winpe-add-packages–optional-components-reference

Add feature packages, also known as optional components, to Windows PE (WinPE).

Languages: When you install each optional component, you must first install the language-neutral optional component and then install the language-specific optional component. The required language resources must be the same version as the language-neutral resources. Language resources are in a folder that has the same name as the language that is installed in the directory of optional components.

Adding optional components

Optional components are included as part of the Windows Assessment and Deployment Kit (Windows ADK), in 32- and 64-bit architectures. When you add optional components to your WinPE image, make sure your optional components are from the same ADK build and have the same architecture as your WinPE image. You can find WinPE optional components in the following locations after you install the ADK.

64-bit C:\Program Files (x86)\Windows Kits\10\Assessment and Deployment Kit\Windows Preinstallation Environment\amd64\WinPE_OCs\

32-bit C:\Program Files (x86)\Windows Kits\10\Assessment and Deployment Kit\Windows Preinstallation Environment\x86\WinPE_OCs\

Get the Windows Assessment and Deployment Kit with Windows PE tools including optional components

Create a set of either 32-bit or 64-bit Windows PE files

  1. Click Start, and type deployment. Right-click Deployment and Imaging Tools Environment and then select Run as administrator.
  2. In the Deployment Tools and Imaging Environment, copy the Windows PE files for the PCs you want to boot.
    • The 64-bit version can boot 64-bit UEFI and 64-bit BIOS PCs.
      copype amd64 C:\WinPE_amd64
      
    • The 32-bit version can boot 32-bit UEFI, 32-bit BIOS, and 64-bit BIOS PCs.
      copype x86 C:\WinPE_x86
      

Mount the Windows PE boot image

  • Mount the Windows PE image.
    Dism /Mount-Image /ImageFile:"C:\WinPE_amd64\media\sources\boot.wim" /index:1 /MountDir:"C:\WinPE_amd64\mount"
    

Add optional components (packages or .cab files)

  1. Add the optional component into Windows PE. To add optional components, you need to add both the optional component and its associated language packs.

    Important
    Some optional components have prerequisites that must be installed in order. See the list of optional components on this page.

  2. Verify that the optional component is part of the image:
    Dism /Get-Packages /Image:"C:\WinPE_amd64\mount"
    

    Review the resulting list of packages and verify that the list contains the optional component and its associated language pack.

Add more languages to images that include optional components

  1. List the optional components in the Windows PE image:
    Dism /Get-Packages /Image:"C:\WinPE_amd64\mount"
    
  2. Review the resulting list of packages, and add the corresponding language packs for each package in the image, including the base Windows PE language pack.

    where … WinPE_OCs\fr-fr\lp.cab represents the base Windows PE language pack.

  3. If you’re adding language packs for Japan, Korea, or China, add the font packages for these languages. Here’s an example for Japan:
    Dism /Add-Package /Image:"C:\WinPE_amd64\mount" /PackagePath:"C:\Program Files (x86)\Windows Kits\10\Assessment and Deployment Kit\Windows Preinstallation Environment\amd64\WinPE_OCs\WinPE-Font Support-JA-JP.cab"
    
  4. Verify that the language packs are part of the image:
    Dism /Get-Packages /Image:"C:\WinPE_amd64\mount"
    

    Review the resulting list of packages and verify that the for each optional component, including the base Windows PE image, that there is an associated language pack.

  5. Change the regional settings to the language you’d like to use:
    Dism /Set-AllIntl:en-US /Image:"C:\WinPE_amd64\mount"
    

    To switch languages while in Windows PE, use wpeutil setmuilanguage.

Unmount the Windows PE image and create media

  1. Unmount the Windows PE image.
    Dism /Unmount-Image /MountDir:"C:\WinPE_amd64\mount" /commit
    
  2. Create bootable media, such as a USB flash drive.
    MakeWinPEMedia /UFD C:\WinPE_amd64 F:
    
  3. Boot the media. Windows PE starts automatically. After the Windows PE window appears, the wpeinit command runs automatically. This may take a few minutes. Verify your customizations.

List of Optional Components

Area/Optional component name Description
Database/WinPE-MDAC WinPE-MDAC supports Microsoft Open Database Connectivity (ODBC), OLE DB, and Microsoft ActiveX Data Objects (ADO). This set of technologies provides access to various data sources, such as Microsoft SQL Server. For example, this access enables queries to Microsoft SQL Server installations that contain ADO objects. You can build a dynamic answer file from unique system information. Similarly, you can build data-driven client or server applications that integrate information from a variety of data sources, both relational (SQL Server) and non-relational.
File management/WinPE-FMAPI WinPE-FMAPI provides access to the Windows PE File Management API (FMAPI) for discovering and restoring deleted files from unencrypted volumes. The FMAPI also provides the ability to use a password or recovery key file for the discovery and recovery of deleted files from Windows BitLocker Drive Encryption encrypted volumes.
Fonts/WinPE-Fonts-Legacy WinPE-Fonts-Legacy contains 32 font files for various languages/writing scripts. Some of these fonts are no longer used as UI fonts. For example, scripts such as Bangla, Devanagari, Gujarati, Gurmukhi, Kannada, Malayalam, Odia, Tamil, Telugu, and Sinhalese were covered by Mangal, Latha, Vrinda, Gautami, Kalinga, artika, Raavi, Shruti, and Tunga, but in Windows 8, they were all unified under Nirmala UI, a single, pan-Indian font. The following list shows the fonts and languages included in this optional component:

  • estre.ttf Estrangelo Edessa (Syriac)
  • mvboli.ttf MV Boli (Thaana)
  • KhmerUI.ttf Khmer UI (Khmer UI)
  • KhmerUIB.ttf Khmer UI Bold (Khmer UI)
  • Laoui.ttf Lao UI (Lao)
  • Laouib.ttf Lao UI Bold (Lao)
  • daunpenh.ttf DaunPenh (Khmer)
  • moolbor.ttf MoolBoran (Khmer)
  • dokchamp.ttf DokChampa (Lao)
  • Himalaya.ttf Microsoft Himalaya (Tibetan)
  • monbaiti.ttf Mongolian Baiti (Mongolian)
  • MSYI.ttf Microsoft Yi Baiti (Yi Syllables)
  • nyala.ttf Nyala (Ethiopic)
  • sylfaen.ttf Sylfaen (Armenian & Georgian)
  • euphemia.ttf Euphemia (Unified Canadian Aboriginal Syllabics)
  • plantc.ttf Plantagenet Cherokee (Cherokee)
Fonts/WinPE-Font Support-JA-JP WinPE-Font Support-JA-JP contains two Japanese font families that are packaged as TrueType Collection (TTC) files. MS Gothic is the Windows Japanese user interface font in versions of Windows before Windows Vista. MS Gothic contains a large character set and embedded bitmaps to ensure legible rendering at small sizes. Meiryo, a font that was introduced in Windows Vista, is designed specifically for use in a Microsoft ClearType® rendering environment. Meiryo does not include embedded bitmaps. Instead, Meiryo relies on hinting instructions to produce legible characters at small sizes. In addition, the module contains two Japanese bitmap fonts, App932.fon and Vga932.fon. The module also contains a bitmap-only TrueType font, Jpn_font.ttf. This font is used on boot screens.
Fonts/WinPE-Font Support-KO-KR WinPE-Font Support-KO-KR contains three core Korean font families: Gulim, Batang and Malgun Gothic. Gulim is the legacy UI font and, as a TTC file, contains Gulim, GulimChe, Dotum and DotumChe. Batang is the legacy text font and is also a TTC file, containing Batang, BatangChe, GungSuh and GungSuhChe. Malgun Gothic, a font that was introduced in Windows Vista, is designed specifically for use in a ClearType rendering environment. Malgun Gothic does not include embedded bitmaps and instead relies on hinting instructions to produce legible characters at small sizes.
Fonts/WinPE-Font Support-ZH-CN WinPE-Font Support-ZH-CN contains two Chinese font families that are packaged as TTC files. Simsun is the Simplified Chinese user interface font in Windows versions before Windows Vista. Simsun contains embedded bitmaps to ensure legible rendering at small sizes. The other TTC font is MingLiu. MingLiu has embedded bitmaps and provides support for the Hong Kong Supplementary Character Set (HKSCS). YaHei, a font that was introduced in Windows Vista, is designed specifically for use in a ClearType rendering environment. YaHei does not include embedded bitmaps. YaHei relies on hinting instructions to produce legible characters at small sizes. In addition, the module contains one bitmap-only TrueType font, Chs_boot.ttf. This font is used on boot screens.
Fonts/WinPE-Font Support-ZH-HKand

WinPE-Font Support-ZH-TW

The Hong Kong and Taiwan optional components contain two Chinese font families that are packaged as TTC files. Simsun is the Simplified Chinese user interface font in Windows versions before Windows Vista. Simsun contains embedded bitmaps to ensure legible rendering at small sizes. MingLiu has embedded bitmaps and provides support for the HKSCS. JhengHei, a font that was introduced in Windows Vista, is designed specifically for use in a ClearType rendering environment. JhengHei does not include embedded bitmaps. JhengHei relies on hinting instructions to produce legible characters at small sizes. In addition, the module contains one bitmap-only TrueType font, Cht_boot.ttf. This font is used on boot screens.
HTML/WinPE-HTA WinPE-HTA provides HTML Application (HTA) support to create GUI applications through the Windows Internet Explorer script engine and HTML services. These applications are trusted and display only the menus, icons, toolbars, and title information that you create.
Input/WinPE-GamingPeripherals WinPE-GamingPeripherals adds support for Xbox wireless controllers in WinPE.
Microsoft .NET/WinPE-NetFX WinPE-NetFX contains a subset of the .NET Framework 4.5 that is designed for client applications.Not all Windows binaries are present in Windows PE, and therefore not all Windows APIs are present or usable. Due to the limited API set, the following .NET Framework features have no or reduced functionality in Windows PE:

  • Windows Presentation Foundation (WPF)
  • Windows Runtime
  • .NET Framework Fusion APIs
  • Windows Control Library event logging
  • .NET Framework COM Interoperability
  • .NET Framework Cryptography Model

Dependencies:

  • Install WinPE-WMI before you install WinPE-NetFX.
  • Install WinPE-HTA to enable limited WPF support.
Network/WinPE-Dot3Svc Adds support for the IEEE 802.X authentication protocol on wired networks. For more info, see WinPE Network Drivers: Initializing and adding drivers.
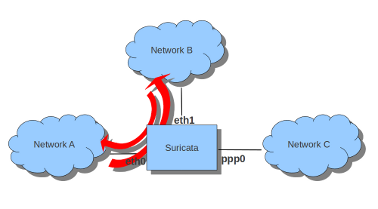
Network/WinPE-PPPoE WinPE-PPPoE enables you to use Point-to-Point Protocol over Ethernet (PPPoE) to create, connect, disconnect, and delete PPPoE connections from Windows PE. PPPoE is a network protocol for encapsulating Point-to-Point Protocol (PPP) frames inside Ethernet frames. PPPoE enables Windows users to remotely connect their computers to the web. By using PPPoE, users can virtually dial from one computer to another over an Ethernet network, to establish a point-to-point connection between the computers. The computers can use this point-to-point connection to transport data packets.
Network/WinPE-RNDIS WinPE-RNDIS contains Remote Network Driver Interface Specification (Remote NDIS) support. WinPE-RNDIS enables network support for devices that implement the Remote NDIS specification over USB. Remote NDIS defines a bus-independent message set and a description of how this message set operates over various I/O buses. Therefore, hardware vendors do not have to write an NDIS miniport device driver. Because this Remote NDIS interface is standardized, one set of host drivers can support any number of bus-attached networking devices.
Network/WinPE-WDS-Tools WinPE-WDS-Tools includes APIs to enable the Image Capture tool and a multicast scenario that involves a custom Windows Deployment Services client. It must be installed if you intend to run the Windows Deployment Services client on a custom Windows PE image.
Network/WinPE-WiFi-Package WinPE-WiFi-Package is used by Windows Recovery Environment (Windows RE). This package is included in the base winre.wim file.
Windows PowerShell/WinPE-PlatformID WinPE-PlatformID contains the Windows PowerShell cmdlets to retrieve the Platform Identifier of the physical machine.

Dependencies: Install WinPE-WMI and WinPE-SecureStartup before you install WinPE-PlatformID.To use the Windows PowerShell cmdlet to retrieve the Platform Identifier, you will need install WinPE-PowerShell package.

Windows PowerShell/WinPE-PowerShell WinPE-PowerShell contains Windows PowerShell–based diagnostics that simplify using Windows Management Instrumentation (WMI) to query the hardware during manufacturing. You can create Windows PowerShell–based deployment and administrative Windows PE–based tools. In addition to deployment, you can use Windows PowerShell for recovery scenarios. Customers can boot in Windows RE and then use Windows PowerShell scripts to resolve issues. Customers are not limited to the toolsets that run in Windows PE. Similarly, you can build scripted offline solutions to recover some computers from no-boot scenarios.

WinPE-PowerShell has the following known limitations:

  • Windows PowerShell remoting is not supported. Any cmdlets that have remoting functionality will return an error.
  • The Windows PowerShell Integrated Scripting Environment (ISE) is not supported.
  • Windows PowerShell 2.0 is not supported.

Dependencies: Install WinPE-WMI > WinPE-NetFX > WinPE-Scripting before you install WinPE-PowerShell.

Windows PowerShell/WinPE-DismCmdlets WinPE-DismCmdlets contains the DISM PowerShell module, which includes cmdlets used for managing and servicing Windows images.

For more info, see Deployment Imaging Servicing Management (DISM) Cmdlets in Windows PowerShell.Dependencies: Install WinPE-WMI > WinPE-NetFX > WinPE-Scripting > WinPE-PowerShell before you install WinPE-DismCmdlets.

Windows PowerShell/WinPE-SecureBootCmdlets WinPE-SecureBootCmdlets contains the PowerShell cmdlets for managing the UEFI (Unified Extensible Firmware Interface) environment variables for Secure Boot.

Dependencies: Install WinPE-WMI > WinPE-NetFX > WinPE-Scripting > WinPE-PowerShell before you install WinPE-SecureBootCmdlets.

Windows PowerShell/WinPE-StorageWMI WinPE-StorageWMI contains PowerShell cmdlets for storage management. These cmdlets use the Windows Storage Management API (SMAPI) to manage local storage, such as disk, partition, and volume objects. Or, these cmdlets use the Windows SMAPI together with array storage management by using a storage management provider. WinPE-StorageWMI also contains Internet SCSI (iSCSI) Initiator cmdlets for connecting a host computer or server to virtual disks on external iSCSI-based storage arrays through an Ethernet network adapter or iSCSI Host Bus Adapter (HBA).

Dependencies: Install WinPE-WMI > WinPE-NetFX > WinPE-Scripting > WinPE-PowerShell before you install WinPE-StorageWMI.

Recovery/WinPE-Rejuv WinPE-Rejuv is used by Windows Recovery Environment (Windows RE). This package is included in the base winre.wim file.
Recovery/WinPE-SRT WinPE-SRT is used by Windows RE. This package is included in the base winre.wim file.
Recovery/WinPE-WinReCfg WinPE-WinReCfg contains the Winrecfg.exe tool, and it enables the following scenarios:

  • Boot from x86-based Windows PE to configure Windows RE settings on an offline x64-based operating system image.
  • Boot from x64-based Windows PE to configure Windows RE settings on an offline x86-based operating system image.
Scripting/WinPE-Scripting WinPE-Scripting contains a multiple-language scripting environment that is ideal for automating system administration tasks, such as batch file processing. Scripts that run in the Windows Script Host (WSH) environment can call WSH objects and other COM-based technologies that support Automation, such as WMI, to manage the Windows subsystems that are central to many system administration tasks.

Dependencies: Install WinPE-Scripting to make sure that full scripting functionality is available when you are using WinPE-NetFX and WinPE-HTA. The installation order is irrelevant.

Scripting/WinPE-WMI WinPE-WMI contains a subset of the Windows Management Instrumentation (WMI) providers that enable minimal system diagnostics. WMI is the infrastructure for management data and operations on Windows-based operating systems. You can write WMI scripts or applications to automate administrative tasks on remote computers. Additionally, WMI supplies management data to other parts of the operating system and products.
Setup/Winpe-LegacySetup Winpe-LegacySetup contains all Setup files from the \Sources folder on the Windows media. Add this optional component when you service Setup or the \Sources folder on the Windows media. You must add this optional component together with the optional component for the Setup feature. To add a new Boot.wim file to the media, add the parent WinPE-Setup, either of the children (WinPE-Setup-Client or WinPE-Setup-Server), and Media optional components. Media Setup is required to support Windows Server 2008 R2 installation.
Setup/WinPE-Setup Winpe-LegacySetup contains all Setup files from the \Sources folder on the Windows media. Add this optional component when you service Setup or the \Sources folder on the Windows media. You must add this optional component together with the optional component for the Setup feature. To add a new Boot.wim file to the media, add the parent WinPE-Setup, either of the children (WinPE-Setup-Client or WinPE-Setup-Server), and Media optional components. Media Setup is required to support Windows Server 2008 R2 installation.
Setup/WinPE-Setup-Client WinPE-Setup-Client contains the client branding files for the parent WinPE-Setup optional component.

Dependencies: Install WinPE-Setup before you install WinPE-Setup-Client.

Setup/WinPE-Setup-Server WinPE-Setup-Server includes the server branding files for the parent WinPE-Setup optional component.

Dependencies: Install WinPE-Setup before you install WinPE-Setup-Server.

Startup/WinPE-SecureStartup WinPE-SecureStartup enables provisioning and management of BitLocker and the Trusted Platform Module (TPM). It includes BitLocker command-line tools, BitLocker WMI management libraries, a TPM driver, TPM Base Services (TBS), the Win32_TPM class, the BitLocker Unlock Wizard, and BitLocker UI libraries. The TPM driver provides better support for both BitLocker and the TPM in this preboot environment.

Dependencies: Install WinPE-WMI before you install WinPE-SecureStartup.

Storage/WinPE-EnhancedStorage WinPE-EnhancedStorage enables Windows to discover additional functionality for storage devices, such as encrypted drives, and implementations that combine Trusted Computing Group (TCG) and IEEE 1667 (“Standard Protocol for Authentication in Host Attachments of Transient Storage Devices”) specifications. This optional component enables Windows to manage these storage devices natively by using BitLocker.

Windows RE optional components

The default Windows RE image contains the following built-in optional components:

  • WinPE-EnhancedStorage
  • WinPE-Rejuv
  • WinPE-Scripting
  • WinPE-SecureStartup
  • WinPE-Setup
  • WinPE-SRT
  • WinPE-WDS-Tools
  • WinPE-WMI

suricata ips/inline mode

ref:

https://redmine.openinfosecfoundation.org/projects/suricata/wiki/Suricata_User_Guide

https://samiux.blogspot.jp/2013/01/howto-suricata-on-ubuntu-1204-lts-server.html

Install

Installation

To setup to install the latest stable Suricata, do:

sudo add-apt-repository ppa:oisf/suricata-stable
sudo apt-get update

Then you can install the latest stable Suricata with:

sudo apt-get install suricata 

or for the Suricata package with build in (enabled) debugging!

sudo apt-get install suricata-dbg

After installation, continue with the Basic Setup.

Upgrading

Upgrading is simple:

sudo apt-get update
sudo apt-get upgrade

Remove

To remove Suricata from your system:

sudo apt-get remove suricata

Beta or RC releases

If you would like to help test the beta or RC packages the same procedures as above applies, we’re just using another PPA “suricata-beta”.

sudo add-apt-repository ppa:oisf/suricata-beta
sudo apt-get update
sudo apt-get upgrade

You can use both the suricata-stable and suricata-beta repositories together. Suricata will then always be the latest release, stable or beta.

https://launchpad.net/~oisf/+archive/suricata-beta

Daily releases

If you would like to help test the daily build packages from our latest git(dev) repository , the same procedures as above applies, we’re just using another PPA “suricata-daily”.

sudo add-apt-repository ppa:oisf/suricata-daily
sudo apt-get update
sudo apt-get upgrade

Please have in mind this is packaged from our latest development git master.

We are doing our best to make you aware of continuing development and items within the engine that are not yet complete or optimal. With this in mind, please
notice the list we have included of known items we are working on. See http://redmine.openinfosecfoundation.org/projects/suricata/issues
for an up to date list and to report new issues.

See http://redmine.openinfosecfoundation.org/projects/suricata/wiki/Known_issues for a discussion and time line for the major issues.

https://launchpad.net/~oisf/+archive/suricata-daily

Init Scripts

https://redmine.openinfosecfoundation.org/projects/suricata/wiki/Init_Scripts

For Ubuntu with Upstart, the following can be used in /etc/init/suricata.conf:

# suricata
description "Intruder Detection System Daemon" 
start on runlevel [2345]
stop on runlevel [!2345]
expect fork
exec suricata -D --pidfile /var/run/suricata.pid -c /etc/suricata/suricata.yaml -i eth1


Setting up IPS/inline for Linux

In this guide will be explained how to work with Suricata in layer3 inline mode and how to set iptables for that purpose.

First start with compiling Suricata with NFQ support. For instructions see Ubuntu Installation.
For more information about NFQ and iptables, see suricata.yaml.

To check if you have NFQ enabled in your Suricata, enter the following command:

suricata --build-info

and examine if you have NFQ between the features.

To run suricata with the NFQ mode, you have to make use of the -q option. This option tells Suricata which of the queue numbers it should use.

sudo suricata -c /etc/suricata/suricata.yaml -q 0


Iptables configuration

First of all it is important to know which traffic you would like to send to Suricata. Traffic that passes your computer or traffic that is generated by your computer.


If Suricata is running on a gateway and is meant to protect the computers behind that gateway you are dealing with the first scenario: forward_ing .
If Suricata has to protect the computer it is running on, you are dealing with the second scenario: host (see drawing 2).
These two ways of using Suricata can also be combined.

The easiest rule in case of the gateway-scenario to send traffic to Suricata is:

sudo iptables -I FORWARD -j NFQUEUE

In this case, all forwarded traffic goes to Suricata.

In case of the host situation, these are the two most simple iptable rules;

sudo iptables -I INPUT -j NFQUEUE
sudo iptables -I OUTPUT -j NFQUEUE

It is possible to set a queue number. If you do not, the queue number will be 0 by default.

Imagine you want Suricata to check for example just TCP-traffic, or all incoming traffic on port 80, or all traffic on destination-port 80, you can do so like this:

sudo iptables -I INPUT -p tcp  -j NFQUEUE
sudo iptables -I OUTPUT -p tcp -j NFQUEUE

In this case, Suricata checks just TCP traffic.

sudo iptables -I INPUT -p tcp --sport 80  -j NFQUEUE
sudo iptables -I OUTPUT -p tcp --dport 80 -j NFQUEUE

In this example, Suricata checks all input and output on port 80.

To see if you have set your iptables rules correct make sure Suricata is running and enter:

sudo iptables -vnL

In the example you can see if packets are being logged.

This description of the use of iptables is the way to use it with IPv4. To use it with IPv6 all previous mentioned commands have to start with ‘ip6tables’. It is also possible to let Suricata check both kinds of traffic.

There is also a way to use iptables with multiple networks (and interface cards). Example:

sudo iptables -I FORWARD -i eth0 -o eth1 -j NFQUEUE
sudo iptables -I FORWARD -i eth1 -o eth0 -j NFQUEUE

The options -i (input) -o (output) can be combined with all previous mentioned options

If you would stop Suricata and use internet, the traffic will not come through. To make internet work correctly, you have to erase all iptable rules.

To erase all iptable rules, enter:

sudo iptables -F


Update /etc/init.d/suricata

vi /etc/init.d/suricata

修改

SURICATA_OPTIONS=" -c $SURCONF --pidfile $PIDFILE $LISTEN_OPTIONS -D -vvv $USER_SWITCH"

SURICATA_OPTIONS=" -D -c /etc/suricata/suricata.yaml -q 0"


Rule Management with Oinkmaster

It is possible to download and install rules manually, but there is a much easier and quicker way to do so. There are special programs which you can use for downloading and installing rules. There is for example Pulled Pork and Oinkmaster. In this documentation the use of Oinkmaster will be described.

To install Oinkmaster, enter:

sudo apt-get install oinkmaster

There are several rulesets. There is for example Emerging Threats (ET) Emerging Threats Pro and VRT.
In this example we are using Emerging Threats.

Oinkmaster has to know where the rules an be found. These rules can be found at:

http://rules.emergingthreats.net/open/suricata/emerging.rules.tar.gz

open oinkmaster.conf to add this link by entering:

sudo nano /etc/oinkmaster.conf

Place a # in front of the url that is already there and add the new url like this:

(Close oinkmaster.conf by pressing ctrl x, followed by y and enter. )

The next step is to create a directory for the new rules. Enter:

sudo mkdir /etc/suricata/rules

Next enter:

cd /etc
sudo oinkmaster -C /etc/oinkmaster.conf -o /etc/suricata/rules

In the new rules directory a classification.config and a reference.config can be found. The directories of both have to be added in the suricata.yaml file. Do so by entering:

sudo nano /etc/suricata/suricata.yaml

And add the new file locations instead of the file locations already present, like this:

To see if everything works as pleased, run Suricata:

suricata -c /etc/suricata/suricata.yaml -i wlan0 (or eth0)

You will notice there are several rule-files Suricata tries to load, but are not available. It is possible to disable those rule-sets in suricata.yaml by deleting them or by putting a # in front of them.
To stop Suricata from running, press ctrl c.

Emerging Threats contains more rules than loaded in Suricata. To see which rules are available in your rules directory, enter:

ls /etc/suricata/rules/*.rules

Find those that are not yet present in suricata.yaml and add them in yaml if desired.

You can do so by entering :

sudo nano /etc/suricata/suricata.yaml

If you disable a rule in your rule file by putting a # in front of it, it will be enabled again the next time you run Oinkmaster. You can disable it through Oinkmaster instead, by entering the following:

cd /etc/suricata/rules

and find the sid of the rule(s) you want to disable.

Subsequently enter:

sudo nano /etc/oinkmaster.conf

and go all the way to the end of the file.
Type there:

disablesid 2010495

Instead of 2010495, type the sid of the rule you would like to disable. It is also possible to disable multiple rules, by entering their sids separated by a comma.

If you run Oinkmaster again, you can see the amount of rules you have disabled.
You can also enable rules that are disabled by default. Do so by entering:

ls /etc/suricata/rules

In this directory you can see several rule-sets
Enter for example:

sudo nano /etc/suricata/rules/emerging-malware.rules

In this file you can see which rules are enabled en which are not.
You can not enable them for the long-term just by simply removing the #. Because each time you will run Oinkmaster, the rule will be disabled again.
Instead, look up the sid of the rule you want to enable. Place the sid in the correct place of oinkmaster.config:

sudo nano /etc/oinkmaster.conf

do so by typing:

enablesid: 2010495

Instead of 2010495, type the sid of the rule you would like to to enable. It is also possible to enable multiple rules, by entering their sids separated by a comma.

In oinkmaster.conf you can modify rules. For example, if you use Suricata as inline/IPS and you want to modify a rule that sends an alert when it matches and you would like the rule to drop the packet instead, you can do so by entering the following:

sudo nano oinkmaster.conf

At the part where you can modify rules, type:

modifysid 2010495 “alert” | “drop”

The sid 2010495 is an example. Type the sid of the rule you desire to change, instead.

Rerun Oinkmaster to notice the change.


Updating your rules

If you have already downloaded a ruleset (in the way described in this file), and you would like to update the rules, enter:

sudo oinkmaster -C /etc/oinkmaster.conf -o /etc/suricata/rules

It is recommended to update your rules frequently. Emerging Threats is modified daily, VRT is updated weekly or multiple times a week.


Ubuntu下保存iptables规则并开机自动加载的方法:


Saving iptables 保存设置

If you were to reboot your machine right now, your iptables configurationwould disapear. Rather than type this each time you reboot, however, you cansave the configuration, and have it start up automatically. To save theconfiguration, you can use iptables-save and iptables-restore.

机器重启后,iptables中的配置信息会被清空。您可以将这些配置保存下来,让iptables在启动时自动加载,省得每次都得重新输入。iptables-save和iptables-restore 是用来保存和恢复设置的。

Configuration onstartup 开机自动加载配置

Save your firewall rules to a file

先将防火墙规则保存到/etc/iptables.up.rules文件中

# iptables-save > /etc/iptables.up.rules   #需要sudo su – root切换用户后执行,直接sudo cmd是不行的

Then modify the/etc/network/interfacesscript to apply the rulesautomatically (the bottom line is added)

然后修改脚本/etc/network/interfaces,使系统能自动应用这些规则(最后一行是我们手工添加的)。

auto eth0

iface eth0 inet dhcp

pre-up iptables-restore < /etc/iptables.up.rules

You can also prepare a set of down rules and apply it automatically

当网络接口关闭后,您可以让iptables使用一套不同的规则集。

auto eth0

iface eth0 inet dhcp

pre-up iptables-restore < /etc/iptables.up.rules

post-down iptables-restore < /etc/iptables.down.rules

HOWTO : Suricata on Ubuntu 12.04 LTS Server

Suricata is an Open Source Next Generation Intrusion Detection and Prevention Engine. This engine is not intended to just replace or emulate the existing tools in the industry, but will bring new ideas and technologies to the field.

There is an Ubuntu PPA of Suricata for Ubuntu 10.04 to 13.04 and the Ubuntu 13.04 is included Suricata in her repositories too. Meanwhile, those packages have IPS mode through NFQUEUE enabled. In addition, Suricata supports nVidia CUDA which requires to recompile the source code with suitable parameter.

Suricata not only can installed on servers but also on desktops and laptops. It performs quiet well on an Intel Atom ITX machine.

For the features, please read here for details.

The following is a basic and general setup of Suricata. For more advanced settings, please refer to the Reference below.

Step 1 :

sudo apt-get install python-software-properties
sudo add-apt-repository ppa:oisf/suricata-stable
sudo apt-get update
sudo apt-get install suricata htp

Step 2 :

To get the Emerging Threats rules :

cd /etc/suricata/

sudo wget https://rules.emergingthreatspro.com/open/suricata/emerging.rules.tar.gz

sudo tar -xvzf emerging.rules.tar.gz

sudo ln -s /etc/suricata/rules/reference.config /etc/suricata/reference.config

sudo ln -s /etc/suricata/UbuntuPPA-configs/classification.config /etc/suricata/classification.config

sudo cp /etc/suricata/UbuntuPPA-configs/suricata-ppa-1.4-6ubuntu6.yaml /etc/suricata/suricata.yaml

*** You can use reference.config and classification.config at /etc/suricata/rules.

sudo mkdir /var/log/suricata
sudo touch /etc/suricata/threshold.config

Step 3 :

sudo nano /etc/suricata/suricata.yaml

Locate the following lines :

default-log-dir: /usr/local/var/log/suricata/
default-rule-path: /usr/local/etc/suricata/rules
classification-file: /usr/local/etc/suricata/classification.config
reference-config-file: /usr/local/etc/suricata/reference.config
#pid-file: /var/run/suricata.pid
#- rule-reload: true
#threshold-file: /usr/local/etc/suricata/threshold.config

– drop
enable: no

Replace with the following lines :

default-log-dir: /var/log/suricata/
default-rule-path: /etc/suricata/rules
classification-file: /etc/suricata/classification.config
reference-config-file: /etc/suricata/reference.config
pid-file: /var/run/suricata.pid
- rule-reload: true
threshold-file: /usr/local/etc/suricata/threshold.config

– drop
enable: yes

To test if it work or not :

sudo suricata -c /etc/suricata/suricata.yaml -i eth0

Several minutes later, check the /var/log/suricata/stats.log and /var/log/suricata/http.log to see if there are some entries or not.

Step 4 :

sudo iptables -A INPUT -j NFQUEUE
sudo iptables -A OUTPUT -j NFQUEUE
sudo iptables -A FORWARD -j NFQUEUE

To test if it work or not :

sudo suricata -c /etc/suricata/suricata.yaml -q 0

Step 5 :

sudo apt-get install oinkmaster

sudo nano /etc/oinkmaster.conf

Append the following line :

url = https://rules.emergingthreatspro.com/open/suricata/emerging.rules.tar.gz

sudo oinkmaster -C /etc/oinkmaster.conf -o /etc/suricata/rules

Step 6 :

When everything is working fine, you can put them in the /etc/rc.local just right above “exit 0” :

#iptables -F
iptables -A INPUT -j NFQUEUE
iptables -A OUTPUT -j NFQUEUE
iptables -A FORWARD -j NFQUEUE

/etc/suricata/ips

Then create a file /etc/suricata/ips :

sudo nano /etc/suricata/ips  suricata -D -c /etc/suricata/suricata.yaml -q 0  oinkmaster -C /etc/oinkmaster.conf -o /etc/suricata/rules kill -USR2 `pidof suricata`

chmod +x /etc/suricata/ips

Then you can write a cron job to update Emerging Threats Rules everyday.

sudo crontab -e

Append the following :

@daily /etc/suricata/update-rules

Then create the update-rule

sudo nano /etc/suricata/update-rules

oinkmaster -C /etc/oinkmaster.conf -o /etc/suricata/rules
kill -USR2 `pidof suricata`

sudo chmod +x /etc/suricata/update-rules

Remarks :

If you want to create a user-interface for the IPS, you can refer to the “Reference” item [12].

If the Suricata acts as IPS gateway, it requires to bridge 2 NICs and 1 NIC for management purpose. In addition, you need to do some changes on the configure files.

If you have 4-cores CPU, you need to change the settings as the following :

iptables -A INPUT -j NFQUEUE --queue-balance 0:3
iptables -A OUTPUT -j NFQUEUE --queue-balance 0:3
iptables -A FORWARD -j NFQUEUE --queue-balance 0:3

suricata -D -c /etc/suricata/suricata.yaml -q 0 -q 1 -q 2 -q 3

linux硬盘检测工具:Smartmontools使用指南(转)

原文:https://linux.cn/article-4461-2.html


转载注:在ubuntu 12.04.2LTS server中使用sudo apt-get install smartmontools来安装

smartmontools是一款开源的磁盘控制,监视工具,可以运行在 Linux,Unix,BSD,Solaris,Mac OS,OS/2,Cygwin和Windows上,同时它还可以从启动光盘或启动软盘运行,支持ATA/ATAPI/SATA-3(到-8)位的硬盘和 SCSI硬盘,另外还支持磁带设备,它的老家在smartmontools.sourceforge.NET,实际上它是一个软件包,包括了两个实用程序:smartctl和smatd。

目前smartmontools的最新版本为2012年6月30日发布的smartmontools v5.43-1,下载地址如下:

Windows版本:http://sourceforge.net/projects/smartmontools/files/smartmontools/5.43/smartmontools-5.43-1.win32-setup.exe/download

Linux版本:http://sourceforge.net/projects/smartmontools/files/smartmontools/5.43/smartmontools-5.43.tar.gz/download

Debian Linux中的安装:

#dpkg -i smartmontools_5.39-1_i386.deb

Red Hat Enterprise Linux, CentOS and Fedora Linux中的安装:

#yum install smartmontools

其它使用RPM包的Linux发行版:

#rpm -ivh smartmontools_5.39-1_i386.deb

如需删除smartmontools包,请使用以下命令:

#rpm -e –noscripts smartmontools

源码包的安装:

#tar zxvf smartmontools-5.42.tar.gz
#cd smartmontools-5.42
#./configure
#make
#make install

1.1 什么是Smartmontools?

Smartmontools是一种硬盘检测工具,通过控制和管理硬盘的SMART(Self Monitoring Analysis and Reporting Technology,自动检测分析及报告技术)技术来实现的,SMART技术可以对硬盘的磁头单元、盘片电机驱动系统、硬盘内部电路以及盘片表面介质材料等进行监测,当SMART监测并分析出硬盘可能出现问题时会及时向用户报警以避免计算机数据受损失。SMART技术必须在主板支持的前提下才能发生作用,而且 SMART技术也不能保证能预报所有可能发生的硬盘故障。SMART(SFF-8035i) 是硬盘生产商们建立的一个工业标准,这个标准就是在硬盘上保存一个跟执行情况,可靠程度,读找错误率等属性的表格。所有属性都有一个1byte(大小范围1-253)的标准化值,还包含另一个1byte的关键阶段值,如果属性表格内某个数据接近小于或达到关键阶段值,表明硬盘工作不正常了。

2.1 Smartmontools的使用

1、启动监控进程
# /etc/init.d/smartd start
启动 smartd: [ 确定 ]

2、检查硬盘是否支持SMART ,     1993年以后出厂的硬盘基本上都支持SMART技术,使用如下命令可以来查看:

# smartctl -i /dev/sda

smartctl version 5.38 [i686-redhat-linux-gnu] Copyright (C) 2002-8 Bruce Allen
Home page is http://smartmontools.sourceforge.net/

=== START OF INFORMATION SECTION ===
Device Model:     ST3320418AS
Serial Number:    9VM1R2WY
Firmware Version: CC35
User Capacity:    320,072,933,376 bytes
Device is:        Not in smartctl database [for details use: -P showall]
ATA Version is:   8
ATA Standard is:  ATA-8-ACS revision 4
Local Time is:    Sun Aug 16 21:25:18 2009 EDT
SMART support is: Available – device has SMART capability.
SMART support is: Enabled

在上面的信息可以看到,该硬盘是支持SMART技术,且当前是开启的。如果SMART support is: Disabled表示SMART未启用,执行如下命令,启动SMART:

smartctl –smart=on –offlineauto=on –saveauto=on /dev/sda

3、检查硬盘健康状态

# smartctl -H /dev/sda
smartctl version 5.33 [i686-turbo-linux-gnu] Copyright (C) 2002-4 Bruce Allen
Home page is http://smartmontools.sourceforge.net/

=== START OF READ SMART DATA SECTION ===
SMART overall-health self-assessment test result: PASSED
请注意result后边的结果:PASSED,这表示硬盘健康状态良好,如果这里显示Failure,那么最好立刻给服务器更换硬盘。SMART只能报告磁盘已经不再健康,但是报警后还能继续运行多久是不确定的,通常,SMART报警参数是有预留的,磁盘报警后,不会当场坏掉,一般能坚持一段时间,有的硬盘SMART报警后还继续跑了好几年,有的硬盘SMART报错后几天就坏了,千万不要存在侥幸心理。执行如下命令可以看到详细的参数:

# smartctl -A /dev/sda

smartctl version 5.38 [i686-redhat-linux-gnu] Copyright (C) 2002-8 Bruce Allen
Home page is http://smartmontools.sourceforge.net/

=== START OF READ SMART DATA SECTION ===
SMART Attributes Data Structure revision number: 10
Vendor Specific SMART Attributes with Thresholds:
ID# ATTRIBUTE_NAME          FLAG     VALUE WORST THRESH TYPE      UPDATED  WHEN_FAILED RAW_VALUE
1 Raw_Read_Error_Rate     0x000f   109   100   006    Pre-fail  Always       –       21618934
3 Spin_Up_Time            0x0003   098   098   000    Pre-fail  Always       –       0
4 Start_Stop_Count        0x0032   100   100   020    Old_age   Always       –       12
5 Reallocated_Sector_Ct   0x0033   100   100   036    Pre-fail  Always       –       0
7 Seek_Error_Rate         0x000f   100   253   030    Pre-fail  Always       –       116923
9 Power_On_Hours          0x0032   100   100   000    Old_age   Always       –       58
10 Spin_Retry_Count        0x0013   100   100   097    Pre-fail  Always       –       0
12 Power_Cycle_Count       0x0032   100   100   020    Old_age   Always       –       6
183 Unknown_Attribute       0x0032   100   100   000    Old_age   Always       –       0
184 Unknown_Attribute       0x0032   100   100   099    Old_age   Always       –       0
187 Reported_Uncorrect      0x0032   100   100   000    Old_age   Always       –       0
188 Unknown_Attribute       0x0032   100   099   000    Old_age   Always       –       4
189 High_Fly_Writes         0x003a   100   100   000    Old_age   Always       –       0
190 Airflow_Temperature_Cel 0x0022   057   056   045    Old_age   Always       –       43 (Lifetime Min/Max 29/44)
194 Temperature_Celsius     0x0022   043   044   000    Old_age   Always       –       43 (0 25 0 0)
195 Hardware_ECC_Recovered  0x001a   048   047   000    Old_age   Always       –       21618934
197 Current_Pending_Sector  0x0012   100   100   000    Old_age   Always       –       0
198 Offline_Uncorrectable   0x0010   100   100   000    Old_age   Offline      –       0
199 UDMA_CRC_Error_Count    0x003e   200   200   000    Old_age   Always       –       0
240 Head_Flying_Hours       0x0000   100   253   000    Old_age   Offline      –       226628244340804
241 Unknown_Attribute       0x0000   100   253   000    Old_age   Offline      –       30093291
242 Unknown_Attribute       0x0000   100   253   000    Old_age   Offline      –       2423580

FLAG是标记,标准数值(VALUE)应当小于或等於关键值(THRESH)。WHEN_FAILED 代表错误信息,上面显示的WHEN_FAILED纵行是空行,说明硬盘没有故障。如果WHEN_FAILED显示数字,表明硬盘磁道可能有比较大的坏道。

4、对硬盘进行检测 手工对硬盘进行测试的方法有以下四种:

smartctl -t short <device> 后台检测硬盘,消耗时间短
smartctl -t long <device> 后台检测硬盘,消耗时间长
smartctl -C -t short <device> 前台检测硬盘,消耗时间短
smartctl -C -t long <device> 前台检测硬盘,消耗时间长
例如,在后台对硬盘进行详细的检查,命令如下:

# smartctl -t long /dev/sda
smartctl version 5.33 [i686-turbo-linux-gnu] Copyright (C) 2002-4 Bruce Allen
Home page is

http://smartmontools.sourceforge.net/

=== START OF OFFLINE IMMEDIATE AND SELF-TEST SECTION ===
Sending command: “Execute SMART Extended self-test routine immediately in off-line mode”.
Drive command “Execute SMART Extended self-test routine immediately in off-line mode” successful.
Testing has begun.
Please wait 54 minutes for test to complete.
Test will complete after Mon Sep 17 03:53:32 2007

Use smartctl -X to abort test.
上面的信息显示54分钟后将完成检查,同时可以使用 smartctl -X 终止检查。

终止硬盘检查命令的使用方法是:

# smartctl -X /dev/sda
smartctl version 5.33 [i686-turbo-linux-gnu] Copyright (C) 2002-4 Bruce Allen
Home page is http://smartmontools.sourceforge.net/

=== START OF OFFLINE IMMEDIATE AND SELF-TEST SECTION ===
Sending command: “Abort SMART off-line mode self-test routine”.
Self-testing aborted!

5、查看硬盘日志 使用“smartctl -l logtype <device>”可以查看硬盘的日志,日志又分为多种类型,如selftest、error等等。

例如查看硬盘检测的日志,如下:

# smartctl -l selftest /dev/sda
smartctl version 5.33 [i686-turbo-linux-gnu] Copyright (C) 2002-4 Bruce Allen
Home page is

http://smartmontools.sourceforge.net/

=== START OF READ SMART DATA SECTION ===
SMART Self-test log structure revision number 1
Num Test_Description Status Remaining LifeTime(hours) LBA_of_first_error
# 1 Extended offline Aborted by host 90% 4365 –
# 2 Extended offline Completed without error 00% 4247 –
# 3 Short offline Aborted by host 30% 4246 –
# 4 Short offline Aborted by host 10% 4246 –
# 5 Extended offline Completed without error 00% 4229 –

查看硬盘错误日志:

# smartctl -l error /dev/sda
smartctl version 5.33 [i686-turbo-linux-gnu] Copyright (C) 2002-4 Bruce Allen
Home page is

http://smartmontools.sourceforge.net/

=== START OF READ SMART DATA SECTION ===
SMART Error Log Version: 1
No Errors Logged

说明没有错误日志

我主要是要看通电时间
所以只用了
smartctl -A /dev/sda

其中
Power_On_Hours 就是我要的数据

google ip pool

http://ipinfo.io/AS15169

http://bgp.he.net/search?search%5Bsearch%5D=google&commit=Search


工具

gogotester_python

https://github.com/NKUCodingCat/gogotester_python


OpenWrt如何脱机(离线)下载BT文件


1.编译aria2

来源:http://www.jianshu.com/p/1042483f90fe

到处搜了下,知识都很零散和碎片,这里做下整理。
想要编译aria2要先编译openwrt。编译平台是debian8。
1.获取openwrt的代码
从openwrt拿到官方代码,见官方页面https://dev.openwrt.org/wiki/GetSource
想要最新的就拉trunk的代码,我之前路由刷的是15.05分支的,创建一个文件夹,拿这个分支的代码:

mkdir openwrt
cd openwrt
git clone git://git.openwrt.org/15.05/openwrt.git

2.安装编译需要的依赖

sudo apt-get install gcc g++ binutils patch bzip2 flex bison make autoconf gettext texinfo unzip sharutils subversion libncurses5-dev ncurses-term zlib1g-dev

3.进入源码文件夹,更新软件包

./scripts/feeds update -a

4.安装一下

./scripts/feeds install -a

5.定制固件

make menuconfig

选择平台,Target System我这里选Broadcom BCM63XX。
选择路由器型号,Target Profile我这里选华为HG556a C版。

默认是不编译aria2的,这里我们要让它编译aria2。
向下翻找到Network–>File Transfer–>aria2,按空格键选中。

默认配置不支持BT和磁力链,我们要配置一下,让我们编译出来的支持这2种下载方式。
选择aria2下面的Aria2 configuration,把里面的Enable bittorent support和Enable metalink support用空格键选中。

好,现在用方向键选Exit一路退出,最后退出时选YES保存一下

6.开始编译

make -j4 V=99

j后面的数字代表用几个线程来编译。
7.编译中遇到的坑
①因为在编译种需要联网下载一些包下来,所以编译的时候一定要联网。
②有的包联网了还不行,还要翻墙才能下载。
③有的包的下载地址用的http开头的无法下载,可以修改openwrt/include/download.mk文件,将第8行的http换成git

④第一遍编译时最好用make -j1 V=99来编译,即用一个线程来编译,以便编译出错时好定位哪里有问题。
8.编译完成
编译完成后在openwrt/bin/brcm63xx/packages/packages文件夹就会有一个aria2的ipk文件了。但是,这个版本是15.05自带的版本,我们需要最新的版本,所以接下来我们就要重新编译一下aria2.
9.下载最新的aria2代码
打开aria2的github项目,在Releases里面下载最新的代码,现在最新的是1.22.0
https://github.com/aria2/aria2/releases
我们选择下载aria2-1.22.0.tar.bz2这个版本
10.替换aria2的代码
将刚才下载的压缩包(不要解压)复制到openwrt/dl目录下,删掉原来的aria2 1.18的压缩包。
修改openwrt/feeds/packages/net/aria2/Makefile文件
将第10行的版本号修改为1.22.0
将第15行的MD5校验注释掉(前面加#号)

11.重新编译
好,现在可以重新编译了
先清除掉原来的编译结果

make package/feeds/packages/aria2/clean V=99

现在查看openwrt/bin/brcm63xx/packages/packages目录,前面编译的aria2 1.18版本已经被清除掉了。
重新编译

make package/feeds/packages/aria2/install V=99

等待一段时间,编译完成
再进到openwrt/bin/brcm63xx/packages/packages,已经可以华丽丽地看到aria2_1.22.0-1_brcm63xx.ipk出现在里面了。
大功告成。


2.配置

路由器OpenWrt如何脱机(离线)下载BT文件

来源:https://www.ytyzx.org/index.php?title=%E8%B7%AF%E7%94%B1%E5%99%A8OpenWrt%E5%A6%82%E4%BD%95%E8%84%B1%E6%9C%BA(%E7%A6%BB%E7%BA%BF)%E4%B8%8B%E8%BD%BDBT%E6%96%87%E4%BB%B6&oldid=4055
Ytyzx讨论 | 贡献2016年10月9日 (日) 02:34的版本
(差异) ←上一版本 | 最后版本 (差异) | 下一版本→ (差异)

本例中所使用之方法为在路由器(OpenWrt维基百科)里面安装Aria2(实测下载速度快于Transmission),直接下载文件到路由器上连接的U盘里(移动硬盘的方法相似), 使用的路由器型号为巴法络(Buffalo)WZR-HP-G450H-CH(刷OpenWrt),前提为需保证路由器可正常连接上互联网。 需要使用以下软件:[PuTTY], WinSCP, Notepad++, FileZilla FTP Client。 如需使用DD-WRT并安装Transmission进行脱机下载,请点击路由器(DD-WRT)如何脱机下载BT文件

1.首先到如下网址下载OpenWrt固件(确保为您使用路由器型号)。 http://downloads.openwrt.org/snapshots/trunk/ar71xx/openwrt-ar71xx-generic-wzr-hp-g450h-squashfs-sysupgrade.bin

2.路由器升级完毕后在telnet命令行输入192.168.1.1(默认地址)连接到路由器(暂时断开上网路由器),默认密码为空,输入“passwd”命令修改密码,修改成功后输入“exit”退出。 如无法开启Telnet,则请点击[Telnet]开启Telnet.

3.在PuTTY中输入192.168.1.1并点击“Open”连接到路由器。关于PuTTY的使用请点击[如何安装及使用PuTTY]。

4.因路由器固件更新,出现如下提示,点击“是(Y)”继续。

5.输入账号(本例中为root)及密码登录。

6.输入“ifconfig”查看网络设置。

7.因本例中经另一个路由器(192.168.1.1)上网,故需修改网络设置,输入“vi /etc/config/network”。

8.按“i”进入编辑状态,将下图中蓝色方框内内容修改为正确的设置,本例中设置此路由器地址为192.168.1.250/24,网关和DNS均为192.168.1.1。 设置完毕后按ESC键并输入“:x”保存退出。

9.输入“/etc/init.d/network restart”重启服务,并连接上网路由器(192.168.1.1)。

10.重新打开PuTTY输入新地址(192.168.1.250)连接到路由器,如还是无法连接Internet,则输入“cd /etc”转到/etc目录,继续输入“vi resolv.conf”编辑文件, 亦可直接输入“vi /etc/resolv.conf”。

11.将下图蓝色方框内内容修改为另一路由器地址(本例中为192.168.1.1),即“nameserver 192.168.1.1”,修改完毕后按“ESC”并输入“:x”保存退出。

12.输入“opkg update”升级opkg。

13.输入“opkg install luci-ssl”安装luci。

14.提示luci安装完毕。

15.在浏览器地址栏输入此路由器地址(本例中为192.168.1.250),出现如下错误提示。

16.在PuTTY里输入“wget -O/etc/config/luci http://svn.luci.subsignal.org/luci/trunk/modules/base/root/etc/config/luci” 下载文件后, 重新安装luci-theme-bootstrap(opkg install luci-theme-bootstrap),安装完毕后输入“reboot”重启此路由器。

17.路由器重启完毕后再浏览器地址栏输入“192.168.1.250”即可打开luci,将U盘正确连接到路由器。

18.输入帐号密码登录,将鼠标移动到“System”,发现无“Mount Points”选项。

19.输入如下命令安装block-mount kmod-fs-ext4 kmod-usb-storage kmod-usb-storage-extras。建议首先运行“opkg update”更新opkg。 opkg install block-mount kmod-fs-ext4 kmod-usb-storage kmod-usb-storage-extras

20.重启路由器后用浏览器登录路由器,在“System”下已出现“Mount Points”选项(可与18步比较)。

21.用PuTTY登录,输入“ls /dev”查看到U盘已被正确识别(蓝色框内sda)。

22.输入“opkg install fdisk e2fsprogs”安装fdisk和e2fsprogs。

23.安装完毕后输入“fdisk /dev/sda”进行分区。

24.输入“m”可查看fdisk命令帮助,输入“n”开始添加新分区。

25.将U盘第一个分区设置为7000M,剩余空间设置为第二个分区。

26.输入“t”将第二个分区设置为交换分区(82),继续输入“w”设置分区表。

27.输入“fdisk -l”或者“ls /dev”即可发现sda1和sda2。

28.输入“mkfs.ext4 /dev/sda1”将第一个分区格式化为ext4格式。

29.输入“mkdir -p /mnt/aria2”在/mnt目录下新建名为aria2的目录,继续输入“mount -t ext4 /dev/sda1 /mnt/aria2 -o rw,sync”将sda1挂载到/mnt/aria2目录下。 注意:如出现类似以下错误,则需检查U盘是否正确连接到路由器或者检查路由器openwrt版本是否正确。 mount: mounting /dev/sda1 on /mnt/aria2 failed: No such device mount: mounting /dev/sda1 on /mnt/aria2 failed: Invalid argument

30.输入“mkswap /dev/sda2”将sda2设置为交换分区,继续输入“swapon /dev/sda2”挂载交换分区,输入“free”即可发现交换分区已正确挂载。 继续输入“df -h”查看sda1是否被正确挂载。

31.因需路由器启动时自动挂载U盘,故输入“block detect > /etc/config/fstab”生成标准fstab文件。

32.输入“vi /etc/config/fstab”编辑fstab文件。

33.本例中修改为如下配置并按ESC键,然后输入“:x”保存退出。如需详细了解各参数请点击以下网址。 http://wiki.openwrt.org/doc/uci/fstab

34.输入“/etc/init.d/fstab enable”使fstab文件在路由器启动时自动启动。 注意:以上修改完毕后,建议重启路由器,并使用“df -h”及“free”命令查看是否正确挂载。

35.用WinSCP连接到路由器,并将下载之aria2文件复制到/tmp目录,因aria2从1.18.5版本后默认不支持BT,故不建议使用“opkg install aria2”安装。

36.在PuTTY里输入“opkg install /tmp/aria2.ipk”安装aria2。

37.安装完毕后输入“aria2c -v”查看aria2版本,本例中版本为1.18.5.

38.安装完毕后输入“touch /mnt/aria2/aria2.session”新建aria2.session文件。

39.输入“aria2c –enable-rpc=true –rpc-listen-all=true –rpc-allow-origin-all -c”启动aria2,需确保可以正常启动再进行下一步。

40.为开机自动启动aria2需新建一个配置文件,首先按“ctrl+c”中止aria2,然后输入“vi /etc/aria2.conf”在/etc目录下新建名为aria2.conf的配置文件。

41.按“i”键进入输入状态,输入如下内容,确保无误后按ESC键并输入“:x”保存退出,注意蓝色框内部分需和您的设置一致。

   #Aria2 configuration
   # RPC Setting
   enable-rpc=true
   rpc-listen-all=true
   rpc-allow-origin-all=true
   rpc-listen-port=6800
   # General Setting
   dir=/mnt/aria2
   input-file=/mnt/aria2/aria2.session
   save-session=/mnt/aria2/aria2.session
   save-session-interval=60
   log=/mnt/aria2/aria2.log
   log-level=warn
   #event-poll=select
   disk-cache=8M
   #enable-mmap=true
   file-allocation=trunc
   user-agent=uTorrent/2210(25130)
   # Connection Setting
   continue=true
   max-connection-per-server=5
   max-concurrent-downloads=3
   min-split-size=5M
   split=5
   max-overall-download-limit=0
   max-overall-upload-limit=0
   max-upload-limit=0
   lowest-speed-limit=0
   auto-save-interval=300
   # BT Setting
   bt-require-crypto=true
   bt-max-peers=100
   enable-peer-exchange=true
   follow-torrent=true
   listen-port=6881-6999

42.亦可在NotePad++里面编辑,然后修改名字为“aria2.conf”。

43.使用WinSCP连接到路由器,将此文件(aria2.conf)复制到“/etc”目录下。

44.输入命令“aria2c –conf-path=/etc/aria2.conf”从配置文件启动aria2。

45.确认可以从配置文件正常启动后,使用浏览器登录路由器,在“System”下点击“Startup”并向下拉动右侧滑动条,找到“Local Startup”框, 输入“aria2c –conf-path=/etc/aria2.conf -D”,并点击右下方“Submit”保存,使aria2在路由器启动是自动在后台运行。

46.因aria2默认为命令行界面,为方便起见,安装图形管理界面YAAW(Yet Another Aria2 Web),点击这里下载。 亦可将以下网址复制到浏览器打开,然后点击右下方的“Download ZIP”按钮下载。 https://github.com/binux/yaaw

47.解压此文件,将文件夹名修改为一个您喜欢的名字(本例中修改为aria2),并使用WinSCP将此文件夹复制到路由器“/www”目录下。

48.在浏览器地址栏输入“路由器IP地址/文件夹名字”(本例中为192.168.1.250/aria2)即可打开YAAW,点击“Add”添加种子文件。 如出现“internal server error”错误,则需检查aria2是否已正常运行或查看YAAW作者网页

49.点击“Upload Torrent”添加种子文件,亦可直接输入下载地址。注意在下图蓝色框内“Dir”输入您设置的下载目录(本例中为/mnt/aria2),点击“Add”按钮确定。

50.开始下载文件。

51.文件下载完毕。

52.因OpenWrt默认不支持FTP,故需要安装vsftpd(very secure FTP daemon),在PuTTY里面输入“opkg install vsftpd”安装。

53.在浏览器里打开路由器控制界面,点击“System”并选择“Startup”,确认vsftpd已经默认启动,建议重启路由器查看是否启动。

52.使用FileZilla把文件复制到本机即可。