android AVD 安装houdini

ref:

https://blog.csdn.net/tkwxty/article/details/107608252

https://dev.to/csjoy/add-arm-support-to-anbox-5668


Houdini: run Arm 32-bit and 64-bit applications on an x86_64 system


Guide:
1. Download the Android command line tools (installing the whole Android studio is only optional).
https://developer.android.com/studio, e.g. extract sdk-tools-linux-4333796.zip to ~/android/sdk.

2. Open a terminal, change directory to ~/android/sdk, and set the following environment variables:

$ export JAVA_OPTS='-XX:+IgnoreUnrecognizedVMOptions --add-modules java.se.ee'
$ export ANDROID_HOME=$HOME/android/sdk
$ export ANDROID_SDK_ROOT=$ANDROID_HOME

3. Download the emulator, platform-tools, and the system-image. Android Nougat (API-25) is selected because easier to modify compared to with the recent versions.

$ ./tools/bin/sdkmanager "platform-tools" "platforms;android-25" "emulator"
$ ./tools/bin/sdkmanager --install "system-images;android-25;google_apis;x86_64"

4. Go to $ANDROID_SDK_ROOT/system-images/android-25/google_apis/x86_64 and increase the size of the system.img (create a backup first!). Allocate at least 128MB for the additional files.

$ cd $ANDROID_SDK_ROOT/system-images/android-25/google_apis/x86_64
$ dd if=/dev/zero bs=1M count=512 >> ./system.img
$ e2fsck -f system.img
$ resize2fs system.img

5. Copy libhoudini binaries. Mount first the system.img before extracting the files.

$ wget http://dl.android-x86.org/houdini/7_y/houdini.sfs -O houdini_7_y.sfs
$ mkdir -p systemfs
$ sudo mount -o loop -t ext4 system.img systemfs
$ sudo unsquashfs -d systemfs/lib/arm houdini_7_y.sfs
$ sudo cp systemfs/lib/arm/libhoudini.so systemfs/lib/
$ sudo cp systemfs/lib/arm/houdini systemfs/bin/

Either set the selinux to permissive (add -selinux permissive option on the emulator) or set the security context of the libhoudini files.

$ sudo setfattr -n security.selinux -v u:object_r:system_file:s0 systemfs/bin/houdini
$ sudo setfattr -n security.selinux -v u:object_r:system_file:s0 systemfs/lib/libhoudini.so
$ sudo setfattr -n security.selinux -v u:object_r:system_file:s0 systemfs/lib/arm
$ sudo setfattr -n security.selinux -v u:object_r:system_file:s0 systemfs/lib/arm/*
$ sudo setfattr -n security.selinux -v u:object_r:system_file:s0 systemfs/lib/arm/nb/*

6. Allows ARM executable file formats

$ sudo mkdir -p systemfs/etc/binfmt_misc
$ echo ":arm_dyn:M::x7fx45x4cx46x01x01x01x00x00x00x00x00x00x00x00x00x03x00x28::/system/bin/houdini:" | sudo tee systemfs/etc/binfmt_misc/arm_dyn
$ echo ":arm_exe:M::x7fx45x4cx46x01x01x01x00x00x00x00x00x00x00x00x00x02x00x28::/system/bin/houdini:" | sudo tee systemfs/etc/binfmt_misc/arm_exe

$ sudo nano systemfs/build.prop

add the following properties to the build.prop (overwrite if existing):

ro.enable.native.bridge.exec=1

ro.product.cpu.abilist=x86_64,x86,armeabi-v7a,armeabi
ro.product.cpu.abilist32=x86,armeabi-v7a,armeabi


7. Enable access to the TVPlus Go USB dongle (vendor id 0x048d, product id 0x9308)

$ echo '<permissions><feature name="android.hardware.usb.host"/></permissions>' | sudo tee systemfs/etc/permissions/android.hardware.usb.host.xml
$ echo 'SUBSYSTEM=="usb", ATTRS{idVendor}=="048d", ATTRS{idProduct}=="9308", GROUP="kvm"' | sudo tee /etc/udev/rules.d/89-usb-android.rules
$ sudo udevadm control --reload-rules

8. Hide from “root-detection” and “running-on-emulator-detection”
i. rename the su executable

$ sudo mv systemfs/xbin/su systemfs/xbin/_s_u

ii. edit again build.prop, check these answers on which properties to be modified. Replace, at least, the “generic” string from ro.product.device and ro.build.fingerprint(not the actual workaround)

iii. (optional) Install Google Play, if you want to watch the encrypted channels – need to pay P20 for the registration (in-app purchase). Copy “Phonesky.apk” from opengapps.org to systemfs/priv-app/Phonesky

iv. finally, unmount the image.

$ sync
$ sudo umount systemfs

9. Extract ramdisk, and edit default.prop

$ mkdir -p ramdiskfs
$ cd ramdiskfs
$ gzip -dc ../ramdisk.img | cpio -i

$ nano default.prop

Replace ro.dalvik.vm.native.bridge=0 with ro.dalvik.vm.native.bridge=libhoudini.so

10. Edit an init configuration file (e.g. init.ranchu.rc) to register the libhoudini by adding these lines:

# Enable native bridge for target executables
on early-init
    mount binfmt_misc binfmt_misc /proc/sys/fs/binfmt_misc

on property:ro.enable.native.bridge.exec=1
    copy /system/etc/binfmt_misc/arm_exe /proc/sys/fs/binfmt_misc/register
    copy /system/etc/binfmt_misc/arm_dyn /proc/sys/fs/binfmt_misc/register

11. Repack the new ramdisk

$ cd ..
$ wget https://github.com/xiaolu/mkbootimg_tools/raw/master/mkbootfs
$ chmod +x mkbootfs
$ ./mkbootfs ./ramdiskfs | gzip > ramdisk.img

12. Create the AVD named “avd_7_1_x86_64” based on “Android TV (720p)” device.

$ ./tools/bin/avdmanager --verbose create avd --force --name "avd_7_1_x86_64" --device "tv_720p" 
  --package "system-images;android-25;google_apis;x86_64" --tag "google_apis" --abi "x86_64"

13. Now launch the emulator.

$ ./tools/emulator @avd_7_1_x86_64 -show-kernel -verbose -memory 2048 
  -qemu -usb -device usb-host,vendorid=0x048d,productid=0x9308

14. Install the TVplus Go Android app, either via the Google Play or via adb install

$ adb install ../apks/TVplus GO_v1.0.28_apkpure.com.apk

15. Finally, plugin the TVplus Go dongle to a USB port and then launch now the app on the emulator

K30Pro/Poco F2 Pro/lmi刷LineageOS

0.备份数据,解锁,去除开机密码

1.更新固件

firmware

https://xiaomifirmwareupdater.com/firmware/lmi/

vendor/

https://xiaomifirmwareupdater.com/archive/vendor/lmi/

2.刷TWRP

原文:https://forum.xda-developers.com/t/firmware-xiaomi-redmi-k30-pro-poco-f2-pro-lmi-auto-updated.4250275/

原作:MBsRoom

Team Win Recovery Project 3.x, or twrp3 for short, is a custom recovery built with ease of use and customization in mind. Its a fully touch driven user interface no more volume rocker or power buttons to mash. The GUI is also fully XML driven and completely theme-able. You can change just about every aspect of the look and feel.

Code:

Code:
/*
*
* We are not responsible for bricked devices, dead SD cards,
* thermonuclear war, or you getting fired because the alarm app failed. Please
* do some research if you have any concerns about features included in this ROM
* before flashing it! YOU are choosing to make these modifications, and if
* you point the finger at us for messing up your device, we will laugh at you.
*
*/

Features:
– Decryption work
– Otg work
-Vibrator
– Zip Flash
– Mtp/adb
– F2FS support
– Fastbootd
– Adb sideload
– Backup restore and images flash

Not working:
-Tell me

INSTALLATION:
1. Download the TWRP image file to your PC.
2. Put your device into fastboot.
3. Type the following command to flash the recovery:-

Code:
fastboot flash recovery "name_of_recovery.img"

4. On installation of TWRP , to boot the recovery do:-

Code:
fastboot boot "name_of_recovery.img"

The device will automatically reboot into TWRP.

5-A. You are using Xiaomi.eu Miui or custom Rom?
You can enjoy with a functional Data Decrypt

5-B You are using Miui EEA – Global -Cn or any custom rom that doesn’t ship custom vbmeta.

6. Download this zip, copy by pc or using otg and flash this zip that will prevent twrp replacing.​
7. Download VbMeta and flash by fastboot​
Code:
fastboot --disable-verity --disable-verification flash vbmeta vbmeta.img"
7. Reboot into twrp (Take longer Time) 
Code:
fastboot boot "name_of_recovery.img"
8. Format Data and Reboot​

NOTES:
By Command fastboot boot, recovery will decrypt everytimes you need, also with Global Rom and without patched vbmeta.

Download:
TWRP

https://sourceforge.net/projects/mbroms/files/TWRPLMI/

VbMeta

https://sourceforge.net/projects/mbroms/files/TWRP/vbmeta.img/download

(Version tag will follow vendor, a lower version tag than your vendor does not mean that recovery will not work)

Kernel Source: HERE

Donation:
PayPal: paypal.me/manuelbiancodev

Telegram Group: @MBsRoom

3.刷LineageOS

3.1解锁,去除开机密码!!

3.2刷LineageOS

18.1

原文:https://forum.xda-developers.com/t/rom-r-official-lineageos-18-1-for-poco-f2-pro-redmi-k30-pro-redmi-k30-pro-zoom-edition-lmi.4203885/

LineageOS is a free, community built, aftermarket firmware distribution of Android 11.0 (R), which is designed to increase performance and reliability over stock Android for your device.

LineageOS is based on the Android Open Source Project with extra contributions from many people within the Android community. It can be used without any need to have any Google application installed. Linked below is a package that has come from another Android project that restore the Google parts. LineageOS does still include various hardware-specific code, which is also slowly being open-sourced anyway.

All the source code for LineageOS is available in the LineageOS Github repo. And if you would like to contribute to LineageOS, please visit out Gerrit Code Review. You can also view the Changelog for a full list of changes & features.

Downloads

https://download.lineageos.org/lmi

Flashing instructions

https://wiki.lineageos.org/devices/lmi/install

Sources:
LineageOS

Happy modding!

3.3 进入系统

如果无法进入系统,可能刷机前没有去除设备密码。重启至twrp,format date分区

3.3 刷OpenGAPP,magisk


3.3 安装google相机

https://www.celsoazevedo.com/files/android/google-camera/dev-arnova8G2/f/dl2/

https://www.celsoazevedo.com/files/android/google-camera/f/configs-arnova-09/


Trouble Shooting

通讯录无法同步解决方案

google play service和google play给予通讯录的权限

虚拟机安装android-x86

1.下载

https://osdn.net/projects/android-x86/releases

选择k49版本(kernel 4.9)

2.安装

默认安装,/system选择read/write

3.虚拟机设置

3.1 virtualbox

1.CPU 勾选虚拟化支持

2.显示选项:选择VboxSVGA,去除3D加速

3.2 vmware

vi /mnt/grub/menu.lst

replace quiet to nomodeset xforcevesa DPI=320

最后加上

vga=ask(ask可以替换为后来的分辨率代码)


4.安装houdini库

4.1 Android x86 Arm NativeBridge (libhoudini)

Houdini is an ARM translation layer for android developed by Intel and Google to run ARM apps on x86 architecture. The project is closed source and nowadays android x86 doesn’t have it pre-installed in the system. To enable ARM Native Bridge on android x86 you need to run the enable_nativebridge command from the terminal, which downloads the .sfs image file from the android x86 servers and runs the ARM activation commands according to your device architecture.

There are mainly 3 types of libhoudini used in android x86 :-

  • houdini_7_x = (x86 arm translation)
  • houdini_7_y = (x86_64 arm translation)
  • houdini_7_z = (x86_64 arm64 translation)

Houdini files are named according to their android version :-

  • Houdini_6 series = android 6.0
  • Houdini_7 series = android 7.0
  • Houdini_8 series = android 8.0
  • Houdini_9 series = android 9.0

Houdini_6 series can be used in android 7.1 as well and the Houdini_8 series can be used in Android 9.0, but a higher version of Houdini is not compatible with the lower version of android.

Download Links :-

Houdini_6 series


http://dl.android-x86.org/houdini/6_x/houdini.sfs
http://dl.android-x86.org/houdini/6_y/houdini.sfs
http://dl.android-x86.org/houdini/6_z/houdini.sfs

Houdini_7 series


http://dl.android-x86.org/houdini/7_x/houdini.sfs
http://dl.android-x86.org/houdini/7_y/houdini.sfs
http://dl.android-x86.org/houdini/7_z/houdini.sfs

Houdini_8 series

http://dl.android-x86.org/houdini/8_x/houdini.sfs
http://dl.android-x86.org/houdini/8_y/houdini.sfs

Houdini_9 series

http://dl.android-x86.org/houdini/9_y/houdini.sfs

How to manually install Arm Native Bridge in android x86

  • Download the required .sfs file from the above links.
  • Rename the file houdini.sfs to houdini7_y.sfs
  • Copy the houdini7_y.sfs file to /data/arm/ folder
  • Do the same for the z series if you want to run the arm64 app.
  • Press alt+f1 to open terminal & run the command enable_nativebridge.
  • if you don’t get any error msg then you’ve successfully activated ARM Native Bridge on your system.
  • Press alt+f7 to return to GUI & download any game/app to test libhoudini.

4.2 connetc adb

adb connect *.*.*.*:5555
adb push houdini.sfs /sdcard/

4.3 启用houdini库

:/sdcard # cp houdini.sfs /system/etc/houdini{version}_y.sfs
:/sdcard # cp houdini.sfs /system/etc/houdini{version}_z.sfs
:/sdcard # /system/bin/enable_nativebridge
:/sdcard # reboot

注:

1.{version}为对应android版本

2.android 8、9无houdini z.sfs


5.系统设置

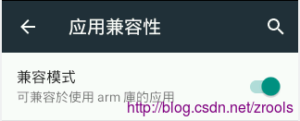
进入系统,在设置->应用兼容性->兼容模式

启用兼容模式


6.相关快捷键

右ctr+h 电源

win   Home

menu  menu

alt+tab 任务切换


android media文件夹新位置

至android 9之后,开机铃音的文件夹位置已经由/system/media以至/product/media

mount -o remount,rw /product


然后将需要的铃音放在/product/media的相应目录下

解决adb无法连接手机的问题

在使用custom kernel情况下,使用adb 手机将不显示允许连接的对话框


解决方法:将主机上adbkey.pub(存储位置为~/.android/)复制到手机的/data/misc/adb/并改名为adb_keys

cd ~/.android/
adb push adbkey.pub /data/misc/adb/adb_keys


参考:https://stackoverflow.com/questions/26213954/how-to-solve-adb-device-unauthorized-in-android-adb-host-device


  • Get the public key from the client phone (adb host)

    cat /data/.android/adbkey.pub

  • copy the above public key to the target phone’s /data/misc/adb/adb_keys location. (you may need to stop the adb daemon first with stop adbd)

    cat /data/misc/adb/adb_keys

verify both cat outputs match.

try restarting adb daemon on target start adbd or just reboot them.

If you are having problems reading or writing to ADB KEYS in above steps, try setting environment variable ADB_KEYS_PATH with a temporary path (eg: /data/local/tmp). Refer to that link it goes into more details

    "On the host, the user public/private key pair is automatically generated,
    if it does not exist, when the adb daemon starts and is stored in
    $HOME/.android/adb_key(.pub) or in $ANDROID_SDK_HOME on windows. If needed,
    the ADB_KEYS_PATH env variable may be set to a :-separated (; under
    Windows) list of private keys, e.g. company-wide or vendor keys.

    On the device, vendors public keys are installed at build time in
    /adb_keys. User-installed keys are stored in /data/misc/adb/adb_keys"

K20Pro 刷LineageOS 17[原]

1.解锁 unlock the bootloader;

2.刷twrp (flash twrp)

从这个帖子里下载twrp,感谢mauronofrio(download twrp from this post, thanks for  mauronofrio’s hard work)

TWRP 3.3.1-25 Unofficial by mauronofrio

https://forum.xda-developers.com/k20-pro/development/recovery-unofficial-twrp-xiaomi-redmi-t3944363

用fasterboot刷recovery(flash twrp recovery via fastboot)

fastboot flash recovery  twrp-3.3.1-25-raphael-mauronofrio.img

进入twrp recovery (reboot to twrp recovery)

注意:不能直接重启进入系统,否则twrp将会被替换(IMPORTANT: After flash twrp, DO NOT REBOOT TO MIUI DIRECTLY, OTHERWISE TWRP WILL BE REPLACED BY MIUI RECOVERY)

fastboot boot twrp-3.3.1-25-raphael-mauronofrio.img

在这个帖子里的地址下载K20Pro 的10.0 vendor和LOS17.0 ROM,用MTP上传至手机,感谢abhishek987


anbox安装

1.安装内核模块

1.1从ppa安装

$ sudo add-apt-repository ppa:morphis/anbox-support
$ sudo apt update
$ sudo apt install linux-headers-generic anbox-modules-dkms

1.2加载内核模块

$ sudo modprobe ashmem_linux
$ sudo modprobe binder_linux

1.3 检测内核模块加载情况

$ ls -1 /dev/{ashmem,binder}
/dev/ashmem
/dev/binder

2.安装anbox

2.1 配置snap使用socks5代理

sudo gedit /etc/environment

添加如下内容:

http_proxy="socks5://127.0.0.1:1080"
https_proxy="socks5://127.0.0.1:1080"

2.2刷新snapd服务

sudo systemctl daemon-reload


sudo systemctl restart snapd.service

2.3安装anbox

2.3.1 安装

$ sudo snap install --devmode --beta anbox

2.3.2 更新

$ snap refresh --beta --devmode anbox


3.安装amr兼容

Install Google Play Store and enable ARM applications / games support on Anbox (Android in a Box)

Update (February, 2019): The script to install Google Play Store and enable ARM (libhoudini) support for Anbox was updated to automatically download the latest open-gapps, fixing an issue that caused Google Play Store to close immediately after starting in some cases (when the Google Play Store version downloaded by the script was too old).

These instructions will obviously not work if Anbox is not already installed on your Linux desktop. If you haven’t already, install Anbox by following the installation instructions found here. Also, make sure you run anbox.appmgr at least once after installing Anbox and before using this script, to avoid running into issues. Also, make sure Anbox is not running when executing the script below (I suspect this is what causes this issue mentioned in the comments).

1. Install the required dependencies (wgetlzipunzip and squashfs-tools).

In Debian, Ubuntu or Linux Mint, use this command to install the required dependencies:

sudo apt install wget curl lzip tar unzip squashfs-tools

2. Download and run the script that automatically downloads and installs Google Play Store (and Google Play Services) and libhoudini (for ARM apps / games support) on your Android in a Box installation.

Warning: never run a script you didn’t write without knowing what it does. Before running this script, check out its code

To download the script and make it executable, use these commands in a terminal:

wget https://raw.githubusercontent.com/geeks-r-us/anbox-playstore-installer/master/install-playstore.sh
chmod +x install-playstore.sh


Now you can run the script:

./install-playstore.sh

Initially the script needed to run with superuser privileges, but that’s no longer the case. After it’s done installing Google Play Store and libhoudini, you can clean the leftovers – remove the anbox-work folder created by the script.

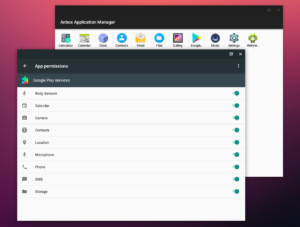
4. To get Google Play Store to work in Anbox, you need to enable all the permissions for both Google Play Store and Google Play Services

To do this, run Anbox:

anbox.appmgr

Then go to Settings > Apps > Google Play Services > Permissions and enable all available permissions. Do the same for Google Play Store!

You should now be able to login using a Google account into Google Play Store.

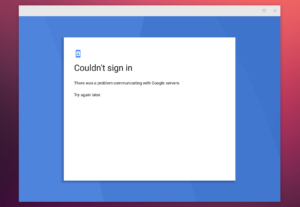
Without enabling all permissions for Google Play Store and Google Play Services, you may encounter an issue when trying to login to your Google account, with the following error message: “Couldn’t sign in. There was a problem communicating with Google servers. Try again later“, as you can see in this screenshot:

After logging in, you can disable some of the Google Play Store / Google Play Services permissions.

If you’re encountering some connectivity issues when logging in to your Google account on Anbox, make sure the anbox-bride.sh is running:

  • to start it:
sudo /snap/anbox/current/bin/anbox-bridge.sh start


  • to restart it:
sudo /snap/anbox/current/bin/anbox-bridge.sh restart

You may also need to install the dnsmasq package if you continue to have connectivity issues with Anbox, according to this user. But this wasn’t required on my Ubuntu 18.04 desktop.


android-x86 设置

1.兼容性问题

Android x86 默认不带houdini,运行纯ARM版会提示:

很抱歉,”xxxx”已停止运行

设置->应用兼容性->打开

终端模拟器

$ su
# enable_nativebridge


脚本会自动下载houdini.tgz并解压到相应位置


2.网络设置

网络设置为桥架模式

adb connect 192.168.56.101:5555
adb devices
adb -s 192.168.56.101:5555 root
adb -s 192.168.56.101:5555 shell


3.ADB安装app

adb install ***.apk

lg v20 刷twrp

1. re-boot into fastboot mode
2. flash twrp use fastboot command.
3. power-off the phone
4. power-on with power and volume down button holding
5. while lg log appears, release power button immediately for 1 second and then hold again
6. when recovery selection screen appears, select ‘yes’ both two times.
now phone boot to twrp recovery.

REMEMBER: WHEN YOU BOOT INTO LG’S SYSTEM AGAIN, YOU WILL LOST TWRP. IF U WANT TO USE TWRP AGAIN, U MUST RE-FLASH TWRP AND REPEAT THE STEPS ABOVE.

THIS WILL LOST ALL DATA(PHONE WILL GET FACTORY RECOVERED)!!


Quote:

Originally Posted by mking007cn 

here is a new problem, each time i start a normal boot, i will lost twrp again. anyone can tell me how to solve this, thank you
You need to delete the file recovery-from-boot.p in /system

Each time you boot, that file gets executed and restores the stock recovery from recoverybak. Alternatively, you can flash TWRP to both recovery and recoverybak.

-- Brian