SYNOPSIS
tor [OPTION value]…
DESCRIPTION
tor is a connection-oriented anonymizing communication service. Users choose a source-routed path through a set of nodes, and negotiate a “virtual circuit” through the network, in which each node knows its predecessor and successor, but no others. Traffic flowing down the circuit is unwrapped by a symmetric key at each node, which reveals the downstream node.
Basically tor provides a distributed network of servers (“onion routers”). Users bounce their TCP streams — web traffic, ftp, ssh, etc — around the routers, and recipients, observers, and even the routers themselves have difficulty tracking the source of the stream.
COMMAND-LINE OPTIONS
-h, -help
Display a short help message and exit.
-f FILE
Specify a new configuration file to contain further Tor configuration options. (Default: $HOME/.torrc, or @CONFDIR@/torrc if that file is not found)
–defaults-torrc FILE
Specify a file in which to find default values for Tor options. The contents of this file are overridden by those in the regular configuration file, and by those on the command line. (Default: @CONFDIR@/torrc-defaults.)
–hash-password
Generates a hashed password for control port access.
–list-fingerprint
Generate your keys and output your nickname and fingerprint.
–verify-config
Verify the configuration file is valid.
–service install [–options command-line options]
Install an instance of Tor as a Windows service, with the provided command-line options. Current instructions can be found at https://trac.torproject.org/projects/tor/wiki/doc/TorFAQ#HowdoIrunmyTorrelayasanNTservice
–service remove|start|stop
Remove, start, or stop a configured Tor Windows service.
–nt-service
Used internally to implement a Windows service.
–list-torrc-options
List all valid options.
–version
Display Tor version and exit.
–quiet|–hush
Override the default console log. By default, Tor starts out logging messages at level “notice” and higher to the console. It stops doing so after it parses its configuration, if the configuration tells it to log anywhere else. You can override this behavior with the –hush option, which tells Tor to only send warnings and errors to the console, or with the –quiet option, which tells Tor not to log to the console at all.
Other options can be specified on the command-line in the format “–option value”, in the format “option value”, or in a configuration file. For instance, you can tell Tor to start listening for SOCKS connections on port 9999 by passing –SOCKSPort 9999 or SOCKSPort 9999 to it on the command line, or by putting “SOCKSPort 9999″ in the configuration file. You will need to quote options with spaces in them: if you want Tor to log all debugging messages to debug.log, you will probably need to say –Log debug file debug.log.
Options on the command line override those in configuration files. See the next section for more information.
THE CONFIGURATION FILE FORMAT
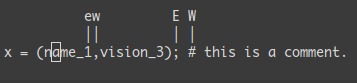
All configuration options in a configuration are written on a single line by default. They take the form of an option name and a value, or an option name and a quoted value (option value or option “value”). Anything after a # character is treated as a comment. Options are case-insensitive. C-style escaped characters are allowed inside quoted values. To split one configuration entry into multiple lines, use a single backslash character () before the end of the line. Comments can be used in such multiline entries, but they must start at the beginning of a line.
By default, an option on the command line overrides an option found in the configuration file, and an option in a configuration file overrides one in the defaults file.
This rule is simple for options that take a single value, but it can become complicated for options that are allowed to occur more than once: if you specify four SOCKSPorts in your configuration file, and one more SOCKSPort on the command line, the option on the command line will replace all of the SOCKSPorts in the configuration file. If this isn’t what you want, prefix the option name with a plus sign, and it will be appended to the previous set of options instead.
Alternatively, you might want to remove every instance of an option in the configuration file, and not replace it at all: you might want to say on the command line that you want no SOCKSPorts at all. To do that, prefix the option name with a forward slash.
GENERAL OPTIONS
BandwidthRate N bytes|KB|MB|GB
A token bucket limits the average incoming bandwidth usage on this node to the specified number of bytes per second, and the average outgoing bandwidth usage to that same value. If you want to run a relay in the public network, this needs to be at the very least 30 KB (that is, 30720 bytes). (Default: 5 MB)
BandwidthBurst N bytes|KB|MB|GB
Limit the maximum token bucket size (also known as the burst) to the given number of bytes in each direction. (Default: 10 MB)
MaxAdvertisedBandwidth N bytes|KB|MB|GB
If set, we will not advertise more than this amount of bandwidth for our BandwidthRate. Server operators who want to reduce the number of clients who ask to build circuits through them (since this is proportional to advertised bandwidth rate) can thus reduce the CPU demands on their server without impacting network performance.
RelayBandwidthRate N bytes|KB|MB|GB
If not 0, a separate token bucket limits the average incoming bandwidth usage for _relayed traffic_ on this node to the specified number of bytes per second, and the average outgoing bandwidth usage to that same value. Relayed traffic currently is calculated to include answers to directory requests, but that may change in future versions. (Default: 0)
RelayBandwidthBurst N bytes|KB|MB|GB
If not 0, limit the maximum token bucket size (also known as the burst) for _relayed traffic_ to the given number of bytes in each direction. (Default: 0)
PerConnBWRate N bytes|KB|MB|GB
If set, do separate rate limiting for each connection from a non-relay. You should never need to change this value, since a network-wide value is published in the consensus and your relay will use that value. (Default: 0)
PerConnBWBurst N bytes|KB|MB|GB
If set, do separate rate limiting for each connection from a non-relay. You should never need to change this value, since a network-wide value is published in the consensus and your relay will use that value. (Default: 0)
ClientTransportPlugin transport socks4|socks5 IP:PORT
ClientTransportPlugin transport exec path-to-binary [options]
In its first form, when set along with a corresponding Bridge line, the Tor client forwards its traffic to a SOCKS-speaking proxy on “IP:PORT”. It’s the duty of that proxy to properly forward the traffic to the bridge.
In its second form, when set along with a corresponding Bridge line, the Tor client launches the pluggable transport proxy executable in path-to-binary using options as its command-line options, and forwards its traffic to it. It’s the duty of that proxy to properly forward the traffic to the bridge.
ServerTransportPlugin transport exec path-to-binary [options]
The Tor relay launches the pluggable transport proxy in path-to-binary using options as its command-line options, and expects to receive proxied client traffic from it.
ConnLimit NUM
The minimum number of file descriptors that must be available to the Tor process before it will start. Tor will ask the OS for as many file descriptors as the OS will allow (you can find this by “ulimit -H -n”). If this number is less than ConnLimit, then Tor will refuse to start.
You probably don’t need to adjust this. It has no effect on Windows since that platform lacks getrlimit(). (Default: 1000)
DisableNetwork 0|1
When this option is set, we don’t listen for or accept any connections other than controller connections, and we don’t make any outbound connections. Controllers sometimes use this option to avoid using the network until Tor is fully configured. (Default: 0)
ConstrainedSockets 0|1
If set, Tor will tell the kernel to attempt to shrink the buffers for all sockets to the size specified inConstrainedSockSize. This is useful for virtual servers and other environments where system level TCP buffers may be limited. If you’re on a virtual server, and you encounter the “Error creating network socket: No buffer space available” message, you are likely experiencing this problem.
The preferred solution is to have the admin increase the buffer pool for the host itself via /proc/sys/net/ipv4/tcp_mem or equivalent facility; this configuration option is a second-resort.
The DirPort option should also not be used if TCP buffers are scarce. The cached directory requests consume additional sockets which exacerbates the problem.
You should not enable this feature unless you encounter the “no buffer space available” issue. Reducing the TCP buffers affects window size for the TCP stream and will reduce throughput in proportion to round trip time on long paths. (Default: 0)
ConstrainedSockSize N bytes|KB
When ConstrainedSockets is enabled the receive and transmit buffers for all sockets will be set to this limit. Must be a value between 2048 and 262144, in 1024 byte increments. Default of 8192 is recommended.
ControlPort PORT|auto
If set, Tor will accept connections on this port and allow those connections to control the Tor process using the Tor Control Protocol (described in control-spec.txt). Note: unless you also specify one or more ofHashedControlPassword or CookieAuthentication, setting this option will cause Tor to allow any process on the local host to control it. (Setting both authentication methods means either method is sufficient to authenticate to Tor.) This option is required for many Tor controllers; most use the value of 9051. Set it to “auto” to have Tor pick a port for you. (Default: 0)
ControlListenAddress IP[:PORT]
Bind the controller listener to this address. If you specify a port, bind to this port rather than the one specified in ControlPort. We strongly recommend that you leave this alone unless you know what you’re doing, since giving attackers access to your control listener is really dangerous. This directive can be specified multiple times to bind to multiple addresses/ports. (Default: 127.0.0.1)
ControlSocket Path
Like ControlPort, but listens on a Unix domain socket, rather than a TCP socket. (Unix and Unix-like systems only.)
ControlSocketsGroupWritable 0|1
If this option is set to 0, don’t allow the filesystem group to read and write unix sockets (e.g. ControlSocket). If the option is set to 1, make the control socket readable and writable by the default GID. (Default: 0)
HashedControlPassword hashed_password
Allow connections on the control port if they present the password whose one-way hash is hashed_password. You can compute the hash of a password by running “tor –hash-password password“. You can provide several acceptable passwords by using more than one HashedControlPassword line.
CookieAuthentication 0|1
If this option is set to 1, allow connections on the control port when the connecting process knows the contents of a file named “control_auth_cookie”, which Tor will create in its data directory. This authentication method should only be used on systems with good filesystem security. (Default: 0)
CookieAuthFile Path
If set, this option overrides the default location and file name for Tor’s cookie file. (See CookieAuthentication above.)
CookieAuthFileGroupReadable 0|1|Groupname
If this option is set to 0, don’t allow the filesystem group to read the cookie file. If the option is set to 1, make the cookie file readable by the default GID. [Making the file readable by other groups is not yet implemented; let us know if you need this for some reason.] (Default: 0)
ControlPortWriteToFile Path
If set, Tor writes the address and port of any control port it opens to this address. Usable by controllers to learn the actual control port when ControlPort is set to “auto”.
ControlPortFileGroupReadable 0|1
If this option is set to 0, don’t allow the filesystem group to read the control port file. If the option is set to 1, make the control port file readable by the default GID. (Default: 0)
DataDirectory DIR
Store working data in DIR (Default: @LOCALSTATEDIR@/lib/tor)
DirServer [nickname] [flags] address:port fingerprint
Use a nonstandard authoritative directory server at the provided address and port, with the specified key fingerprint. This option can be repeated many times, for multiple authoritative directory servers. Flags are separated by spaces, and determine what kind of an authority this directory is. By default, every authority is authoritative for current (“v2″)-style directories, unless the “no-v2″ flag is given. If the “v1″ flags is provided, Tor will use this server as an authority for old-style (v1) directories as well. (Only directory mirrors care about this.) Tor will use this server as an authority for hidden service information if the “hs” flag is set, or if the “v1″ flag is set and the “no-hs” flag isnot set. Tor will use this authority as a bridge authoritative directory if the “bridge” flag is set. If a flag “orport=port” is given, Tor will use the given port when opening encrypted tunnels to the dirserver. Lastly, if a flag “v3ident=fp” is given, the dirserver is a v3 directory authority whose v3 long-term signing key has the fingerprintfp.
If no dirserver line is given, Tor will use the default directory servers. NOTE: this option is intended for setting up a private Tor network with its own directory authorities. If you use it, you will be distinguishable from other users, because you won’t believe the same authorities they do.
DynamicDHGroups 0|1
If this option is set to 1, when running as a server, generate our own Diffie-Hellman group instead of using the one from Apache’s mod_ssl. This option may help circumvent censorship based on static Diffie-Hellman parameters. (Default: 0)
AlternateDirAuthority [nickname] [flags] address:port fingerprint
AlternateHSAuthority [nickname] [flags] address:port fingerprint
AlternateBridgeAuthority [nickname] [flags] address:port fingerprint
These options behave as DirServer, but they replace fewer of the default directory authorities. Using AlternateDirAuthority replaces the default Tor directory authorities, but leaves the default hidden service authorities and bridge authorities in place. Similarly, AlternateHSAuthority replaces the default hidden service authorities, but not the directory or bridge authorities; and AlternateBridgeAuthority replaces the default bridge authority, but leaves the directory and hidden service authorities alone.
DisableAllSwap 0|1
If set to 1, Tor will attempt to lock all current and future memory pages, so that memory cannot be paged out. Windows, OS X and Solaris are currently not supported. We believe that this feature works on modern Gnu/Linux distributions, and that it should work on *BSD systems (untested). This option requires that you start your Tor as root, and you should use the User option to properly reduce Tor’s privileges. (Default: 0)
DisableDebuggerAttachment 0|1
If set to 1, Tor will attempt to prevent basic debugging attachment attempts by other processes. It has no impact for users who wish to attach if they have CAP_SYS_PTRACE or if they are root. We believe that this feature works on modern Gnu/Linux distributions, and that it may also work on *BSD systems (untested). Some modern Gnu/Linux systems such as Ubuntu have the kernel.yama.ptrace_scope sysctl and by default enable it as an attempt to limit the PTRACE scope for all user processes by default. This feature will attempt to limit the PTRACE scope for Tor specifically – it will not attempt to alter the system wide ptrace scope as it may not even exist. If you wish to attach to Tor with a debugger such as gdb or strace you will want to set this to 0 for the duration of your debugging. Normal users should leave it on. Disabling this option while Tor is running is prohibited. (Default: 1)
FetchDirInfoEarly 0|1
If set to 1, Tor will always fetch directory information like other directory caches, even if you don’t meet the normal criteria for fetching early. Normal users should leave it off. (Default: 0)
FetchDirInfoExtraEarly 0|1
If set to 1, Tor will fetch directory information before other directory caches. It will attempt to download directory information closer to the start of the consensus period. Normal users should leave it off. (Default: 0)
FetchHidServDescriptors 0|1
If set to 0, Tor will never fetch any hidden service descriptors from the rendezvous directories. This option is only useful if you’re using a Tor controller that handles hidden service fetches for you. (Default: 1)
FetchServerDescriptors 0|1
If set to 0, Tor will never fetch any network status summaries or server descriptors from the directory servers. This option is only useful if you’re using a Tor controller that handles directory fetches for you. (Default: 1)
FetchUselessDescriptors 0|1
If set to 1, Tor will fetch every non-obsolete descriptor from the authorities that it hears about. Otherwise, it will avoid fetching useless descriptors, for example for routers that are not running. This option is useful if you’re using the contributed “exitlist” script to enumerate Tor nodes that exit to certain addresses. (Default: 0)
HTTPProxy host[:port]
Tor will make all its directory requests through this host:port (or host:80 if port is not specified), rather than connecting directly to any directory servers.
HTTPProxyAuthenticator username:password
If defined, Tor will use this username:password for Basic HTTP proxy authentication, as in RFC 2617. This is currently the only form of HTTP proxy authentication that Tor supports; feel free to submit a patch if you want it to support others.
HTTPSProxy host[:port]
Tor will make all its OR (SSL) connections through this host:port (or host:443 if port is not specified), via HTTP CONNECT rather than connecting directly to servers. You may want to set FascistFirewall to restrict the set of ports you might try to connect to, if your HTTPS proxy only allows connecting to certain ports.
HTTPSProxyAuthenticator username:password
If defined, Tor will use this username:password for Basic HTTPS proxy authentication, as in RFC 2617. This is currently the only form of HTTPS proxy authentication that Tor supports; feel free to submit a patch if you want it to support others.
Socks4Proxy host[:port]
Tor will make all OR connections through the SOCKS 4 proxy at host:port (or host:1080 if port is not specified).
Socks5Proxy host[:port]
Tor will make all OR connections through the SOCKS 5 proxy at host:port (or host:1080 if port is not specified).
Socks5ProxyUsername username
Socks5ProxyPassword password
If defined, authenticate to the SOCKS 5 server using username and password in accordance to RFC 1929. Both username and password must be between 1 and 255 characters.
KeepalivePeriod NUM
To keep firewalls from expiring connections, send a padding keepalive cell every NUM seconds on open connections that are in use. If the connection has no open circuits, it will instead be closed after NUM seconds of idleness. (Default: 5 minutes)
Log minSeverity[-maxSeverity] stderr|stdout|syslog
Send all messages between minSeverity and maxSeverity to the standard output stream, the standard error stream, or to the system log. (The “syslog” value is only supported on Unix.) Recognized severity levels are debug, info, notice, warn, and err. We advise using “notice” in most cases, since anything more verbose may provide sensitive information to an attacker who obtains the logs. If only one severity level is given, all messages of that level or higher will be sent to the listed destination.
Log minSeverity[-maxSeverity] file FILENAME
As above, but send log messages to the listed filename. The “Log” option may appear more than once in a configuration file. Messages are sent to all the logs that match their severity level.
Log [domain,…]minSeverity[-maxSeverity] … file FILENAME
Log [domain,…]minSeverity[-maxSeverity] … stderr|stdout|syslog
As above, but select messages by range of log severity and by a set of “logging domains”. Each logging domain corresponds to an area of functionality inside Tor. You can specify any number of severity ranges for a single log statement, each of them prefixed by a comma-separated list of logging domains. You can prefix a domain with ~ to indicate negation, and use * to indicate “all domains”. If you specify a severity range without a list of domains, it matches all domains.
This is an advanced feature which is most useful for debugging one or two of Tor’s subsystems at a time.
The currently recognized domains are: general, crypto, net, config, fs, protocol, mm, http, app, control, circ, rend, bug, dir, dirserv, or, edge, acct, hist, and handshake. Domain names are case-insensitive.
For example, “Log [handshake]debug [~net,~mm]info notice stdout” sends to stdout: all handshake messages of any severity, all info-and-higher messages from domains other than networking and memory management, and all messages of severity notice or higher.
LogMessageDomains 0|1
If 1, Tor includes message domains with each log message. Every log message currently has at least one domain; most currently have exactly one. This doesn’t affect controller log messages. (Default: 0)
OutboundBindAddress IP
Make all outbound connections originate from the IP address specified. This is only useful when you have multiple network interfaces, and you want all of Tor’s outgoing connections to use a single one. This setting will be ignored for connections to the loopback addresses (127.0.0.0/8 and ::1).
PidFile FILE
On startup, write our PID to FILE. On clean shutdown, remove FILE.
ProtocolWarnings 0|1
If 1, Tor will log with severity ‘warn’ various cases of other parties not following the Tor specification. Otherwise, they are logged with severity ‘info’. (Default: 0)
RunAsDaemon 0|1
If 1, Tor forks and daemonizes to the background. This option has no effect on Windows; instead you should use the –service command-line option. (Default: 0)
LogTimeGranularity NUM
Set the resolution of timestamps in Tor’s logs to NUM milliseconds. NUM must be positive and either a divisor or a multiple of 1 second. Note that this option only controls the granularity written by Tor to a file or console log. Tor does not (for example) “batch up” log messages to affect times logged by a controller, times attached to syslog messages, or the mtime fields on log files. (Default: 1 second)
SafeLogging 0|1|relay
Tor can scrub potentially sensitive strings from log messages (e.g. addresses) by replacing them with the string [scrubbed]. This way logs can still be useful, but they don’t leave behind personally identifying information about what sites a user might have visited.
If this option is set to 0, Tor will not perform any scrubbing, if it is set to 1, all potentially sensitive strings are replaced. If it is set to relay, all log messages generated when acting as a relay are sanitized, but all messages generated when acting as a client are not. (Default: 1)
User UID
On startup, setuid to this user and setgid to their primary group.
HardwareAccel 0|1
If non-zero, try to use built-in (static) crypto hardware acceleration when available. (Default: 0)
AccelName NAME
When using OpenSSL hardware crypto acceleration attempt to load the dynamic engine of this name. This must be used for any dynamic hardware engine. Names can be verified with the openssl engine command.
AccelDir DIR
Specify this option if using dynamic hardware acceleration and the engine implementation library resides somewhere other than the OpenSSL default.
AvoidDiskWrites 0|1
If non-zero, try to write to disk less frequently than we would otherwise. This is useful when running on flash memory or other media that support only a limited number of writes. (Default: 0)
TunnelDirConns 0|1
If non-zero, when a directory server we contact supports it, we will build a one-hop circuit and make an encrypted connection via its ORPort. (Default: 1)
PreferTunneledDirConns 0|1
If non-zero, we will avoid directory servers that don’t support tunneled directory connections, when possible. (Default: 1)
CircuitPriorityHalflife NUM1
If this value is set, we override the default algorithm for choosing which circuit’s cell to deliver or relay next. When the value is 0, we round-robin between the active circuits on a connection, delivering one cell from each in turn. When the value is positive, we prefer delivering cells from whichever connection has the lowest weighted cell count, where cells are weighted exponentially according to the supplied CircuitPriorityHalflife value (in seconds). If this option is not set at all, we use the behavior recommended in the current consensus networkstatus. This is an advanced option; you generally shouldn’t have to mess with it. (Default: not set)
DisableIOCP 0|1
If Tor was built to use the Libevent’s “bufferevents” networking code and you’re running on Windows, setting this option to 1 will tell Libevent not to use the Windows IOCP networking API. (Default: 1)
UserspaceIOCPBuffers 0|1
If IOCP is enabled (see DisableIOCP above), setting this option to 1 will tell Tor to disable kernel-space TCP buffers, in order to avoid needless copy operations and try not to run out of non-paged RAM. This feature is experimental; don’t use it yet unless you’re eager to help tracking down bugs. (Default: 0)
_UseFilteringSSLBufferevents 0|1
Tells Tor to do its SSL communication using a chain of bufferevents: one for SSL and one for networking. This option has no effect if bufferevents are disabled (in which case it can’t turn on), or if IOCP bufferevents are enabled (in which case it can’t turn off). This option is useful for debugging only; most users shouldn’t touch it. (Default: 0)
CountPrivateBandwidth 0|1
If this option is set, then Tor’s rate-limiting applies not only to remote connections, but also to connections to private addresses like 127.0.0.1 or 10.0.0.1. This is mostly useful for debugging rate-limiting. (Default: 0)
CLIENT OPTIONS
The following options are useful only for clients (that is, if SocksPort, TransPort, DNSPort, or NATDPort is non-zero):
AllowInvalidNodes entry|exit|middle|introduction|rendezvous|…
If some Tor servers are obviously not working right, the directory authorities can manually mark them as invalid, meaning that it’s not recommended you use them for entry or exit positions in your circuits. You can opt to use them in some circuit positions, though. The default is “middle,rendezvous”, and other choices are not advised.
ExcludeSingleHopRelays 0|1
This option controls whether circuits built by Tor will include relays with the AllowSingleHopExits flag set to true. If ExcludeSingleHopRelays is set to 0, these relays will be included. Note that these relays might be at higher risk of being seized or observed, so they are not normally included. Also note that relatively few clients turn off this option, so using these relays might make your client stand out. (Default: 1)
Bridge [transport] IP:ORPort [fingerprint]
When set along with UseBridges, instructs Tor to use the relay at “IP:ORPort” as a “bridge” relaying into the Tor network. If “fingerprint” is provided (using the same format as for DirServer), we will verify that the relay running at that location has the right fingerprint. We also use fingerprint to look up the bridge descriptor at the bridge authority, if it’s provided and if UpdateBridgesFromAuthority is set too.
If “transport” is provided, and matches to a ClientTransportPlugin line, we use that pluggable transports proxy to transfer data to the bridge.
LearnCircuitBuildTimeout 0|1
If 0, CircuitBuildTimeout adaptive learning is disabled. (Default: 1)
CircuitBuildTimeout NUM
Try for at most NUM seconds when building circuits. If the circuit isn’t open in that time, give up on it. If LearnCircuitBuildTimeout is 1, this value serves as the initial value to use before a timeout is learned. If LearnCircuitBuildTimeout is 0, this value is the only value used. (Default: 60 seconds)
CircuitIdleTimeout NUM
If we have kept a clean (never used) circuit around for NUM seconds, then close it. This way when the Tor client is entirely idle, it can expire all of its circuits, and then expire its TLS connections. Also, if we end up making a circuit that is not useful for exiting any of the requests we’re receiving, it won’t forever take up a slot in the circuit list. (Default: 1 hour)
CircuitStreamTimeout NUM
If non-zero, this option overrides our internal timeout schedule for how many seconds until we detach a stream from a circuit and try a new circuit. If your network is particularly slow, you might want to set this to a number like 60. (Default: 0)
ClientOnly 0|1
If set to 1, Tor will under no circumstances run as a relay or serve directory requests. This config option is mostly meaningless: we added it back when we were considering having Tor clients auto-promote themselves to being relays if they were stable and fast enough. The current behavior is simply that Tor is a client unless ORPort or DirPort are configured. (Default: 0)
ExcludeNodes node,node,…
A list of identity fingerprints, nicknames, country codes and address patterns of nodes to avoid when building a circuit. (Example: ExcludeNodes SlowServer, ABCD1234CDEF5678ABCD1234CDEF5678ABCD1234, {cc}, 255.254.0.0/8)
By default, this option is treated as a preference that Tor is allowed to override in order to keep working. For example, if you try to connect to a hidden service, but you have excluded all of the hidden service’s introduction points, Tor will connect to one of them anyway. If you do not want this behavior, set the StrictNodes option (documented below).
Note also that if you are a relay, this (and the other node selection options below) only affects your own circuits that Tor builds for you. Clients can still build circuits through you to any node. Controllers can tell Tor to build circuits through any node.
ExcludeExitNodes node,node,…
A list of identity fingerprints, nicknames, country codes and address patterns of nodes to never use when picking an exit node—that is, a node that delivers traffic for you outside the Tor network. Note that any node listed in ExcludeNodes is automatically considered to be part of this list too. See also the caveats on the “ExitNodes” option below.
ExitNodes node,node,…
A list of identity fingerprints, nicknames, country codes and address patterns of nodes to use as exit node—that is, a node that delivers traffic for you outside the Tor network.
Note that if you list too few nodes here, or if you exclude too many exit nodes with ExcludeExitNodes, you can degrade functionality. For example, if none of the exits you list allows traffic on port 80 or 443, you won’t be able to browse the web.
Note also that not every circuit is used to deliver traffic outside of the Tor network. It is normal to see non-exit circuits (such as those used to connect to hidden services, those that do directory fetches, those used for relay reachability self-tests, and so on) that end at a non-exit node. To keep a node from being used entirely, see ExcludeNodes and StrictNodes.
The ExcludeNodes option overrides this option: any node listed in both ExitNodes and ExcludeNodes is treated as excluded.
The .exit address notation, if enabled via AllowDotExit, overrides this option.
EntryNodes node,node,…
A list of identity fingerprints, nicknames, and country codes of nodes to use for the first hop in your normal circuits. Normal circuits include all circuits except for direct connections to directory servers. The Bridge option overrides this option; if you have configured bridges and UseBridges is 1, the Bridges are used as your entry nodes.
The ExcludeNodes option overrides this option: any node listed in both EntryNodes and ExcludeNodes is treated as excluded.
StrictNodes 0|1
If StrictNodes is set to 1, Tor will treat the ExcludeNodes option as a requirement to follow for all the circuits you generate, even if doing so will break functionality for you. If StrictNodes is set to 0, Tor will still try to avoid nodes in the ExcludeNodes list, but it will err on the side of avoiding unexpected errors. Specifically, StrictNodes 0 tells Tor that it is okay to use an excluded node when it is necessary to perform relay reachability self-tests, connect to a hidden service, provide a hidden service to a client, fulfill a .exit request, upload directory information, or download directory information. (Default: 0)
FascistFirewall 0|1
If 1, Tor will only create outgoing connections to ORs running on ports that your firewall allows (defaults to 80 and 443; see FirewallPorts). This will allow you to run Tor as a client behind a firewall with restrictive policies, but will not allow you to run as a server behind such a firewall. If you prefer more fine-grained control, use ReachableAddresses instead.
FirewallPorts PORTS
A list of ports that your firewall allows you to connect to. Only used when FascistFirewall is set. This option is deprecated; use ReachableAddresses instead. (Default: 80, 443)
ReachableAddresses ADDR[/MASK][:PORT]…
A comma-separated list of IP addresses and ports that your firewall allows you to connect to. The format is as for the addresses in ExitPolicy, except that “accept” is understood unless “reject” is explicitly provided. For example, ‘ReachableAddresses 99.0.0.0/8, reject 18.0.0.0/8:80, accept *:80′ means that your firewall allows connections to everything inside net 99, rejects port 80 connections to net 18, and accepts connections to port 80 otherwise. (Default: ‘accept *:*’.)
ReachableDirAddresses ADDR[/MASK][:PORT]…
Like ReachableAddresses, a list of addresses and ports. Tor will obey these restrictions when fetching directory information, using standard HTTP GET requests. If not set explicitly then the value of ReachableAddresses is used. If HTTPProxy is set then these connections will go through that proxy.
ReachableORAddresses ADDR[/MASK][:PORT]…
Like ReachableAddresses, a list of addresses and ports. Tor will obey these restrictions when connecting to Onion Routers, using TLS/SSL. If not set explicitly then the value of ReachableAddresses is used. If HTTPSProxy is set then these connections will go through that proxy.
The separation between ReachableORAddresses and ReachableDirAddresses is only interesting when you are connecting through proxies (see HTTPProxy and HTTPSProxy). Most proxies limit TLS connections (which Tor uses to connect to Onion Routers) to port 443, and some limit HTTP GET requests (which Tor uses for fetching directory information) to port 80.
HidServAuth onion-address auth-cookie [service-name]
Client authorization for a hidden service. Valid onion addresses contain 16 characters in a-z2-7 plus “.onion”, and valid auth cookies contain 22 characters in A-Za-z0-9+/. The service name is only used for internal purposes, e.g., for Tor controllers. This option may be used multiple times for different hidden services. If a hidden service uses authorization and this option is not set, the hidden service is not accessible. Hidden services can be configured to require authorization using the HiddenServiceAuthorizeClient option.
CloseHSClientCircuitsImmediatelyOnTimeout 0|1
If 1, Tor will close unfinished hidden service client circuits which have not moved closer to connecting to their destination hidden service when their internal state has not changed for the duration of the current circuit-build timeout. Otherwise, such circuits will be left open, in the hope that they will finish connecting to their destination hidden services. In either case, another set of introduction and rendezvous circuits for the same destination hidden service will be launched. (Default: 0)
CloseHSServiceRendCircuitsImmediatelyOnTimeout 0|1
If 1, Tor will close unfinished hidden-service-side rendezvous circuits after the current circuit-build timeout. Otherwise, such circuits will be left open, in the hope that they will finish connecting to their destinations. In either case, another rendezvous circuit for the same destination client will be launched. (Default: 0)
LongLivedPorts PORTS
A list of ports for services that tend to have long-running connections (e.g. chat and interactive shells). Circuits for streams that use these ports will contain only high-uptime nodes, to reduce the chance that a node will go down before the stream is finished. Note that the list is also honored for circuits (both client and service side) involving hidden services whose virtual port is in this list. (Default: 21, 22, 706, 1863, 5050, 5190, 5222, 5223, 6523, 6667, 6697, 8300)
MapAddress address newaddress
When a request for address arrives to Tor, it will transform to newaddress before processing it. For example, if you always want connections to www.example.com to exit via torserver (where torserver is the nickname of the server), use “MapAddress www.example.com www.example.com.torserver.exit”. If the value is prefixed with a “*.”, matches an entire domain. For example, if you always want connections to example.com and any if its subdomains to exit via torserver (where torserver is the nickname of the server), use “MapAddress *.example.com *.example.com.torserver.exit”. (Note the leading “*.” in each part of the directive.) You can also redirect all subdomains of a domain to a single address. For example, “MapAddress *.example.com www.example.com”.
NOTES:
When evaluating MapAddress expressions Tor stops when it hits the most recently added expression that matches the requested address. So if you have the following in your torrc, www.torproject.org will map to 1.1.1.1:
MapAddress www.torproject.org 2.2.2.2
MapAddress www.torproject.org 1.1.1.1
Tor evaluates the MapAddress configuration until it finds no matches. So if you have the following in your torrc, www.torproject.org will map to 2.2.2.2:
MapAddress 1.1.1.1 2.2.2.2
MapAddress www.torproject.org 1.1.1.1
The following MapAddress expression is invalid (and will be ignored) because you cannot map from a specific address to a wildcard address:
MapAddress www.torproject.org *.torproject.org.torserver.exit
Using a wildcard to match only part of a string (as in *ample.com) is also invalid.
NewCircuitPeriod NUM
Every NUM seconds consider whether to build a new circuit. (Default: 30 seconds)
MaxCircuitDirtiness NUM
Feel free to reuse a circuit that was first used at most NUM seconds ago, but never attach a new stream to a circuit that is too old. For hidden services, this applies to the last time a circuit was used, not the first. (Default: 10 minutes)
MaxClientCircuitsPending NUM
Do not allow more than NUM circuits to be pending at a time for handling client streams. A circuit is pending if we have begun constructing it, but it has not yet been completely constructed. (Default: 32)
NodeFamily node,node,…
The Tor servers, defined by their identity fingerprints or nicknames, constitute a “family” of similar or co-administered servers, so never use any two of them in the same circuit. Defining a NodeFamily is only needed when a server doesn’t list the family itself (with MyFamily). This option can be used multiple times. In addition to nodes, you can also list IP address and ranges and country codes in {curly braces}.
EnforceDistinctSubnets 0|1
If 1, Tor will not put two servers whose IP addresses are “too close” on the same circuit. Currently, two addresses are “too close” if they lie in the same /16 range. (Default: 1)
SOCKSPort [address:]port|auto [isolation flags]
Open this port to listen for connections from SOCKS-speaking applications. Set this to 0 if you don’t want to allow application connections via SOCKS. Set it to “auto” to have Tor pick a port for you. This directive can be specified multiple times to bind to multiple addresses/ports. (Default: 9050)
The isolation flags arguments give Tor rules for which streams received on this SOCKSPort are allowed to share circuits with one another. Recognized isolation flags are:
IsolateClientAddr
Don’t share circuits with streams from a different client address. (On by default and strongly recommended; you can disable it with NoIsolateClientAddr.)
IsolateSOCKSAuth
Don’t share circuits with streams for which different SOCKS authentication was provided. (On by default; you can disable it with NoIsolateSOCKSAuth.)
IsolateClientProtocol
Don’t share circuits with streams using a different protocol. (SOCKS 4, SOCKS 5, TransPort connections, NATDPort connections, and DNSPort requests are all considered to be different protocols.)
IsolateDestPort
Don’t share circuits with streams targetting a different destination port.
IsolateDestAddr
Don’t share circuits with streams targetting a different destination address.
SessionGroup=INT
If no other isolation rules would prevent it, allow streams on this port to share circuits with streams from every other port with the same session group. (By default, streams received on different SOCKSPorts, TransPorts, etc are always isolated from one another. This option overrides that behavior.)
SOCKSListenAddress IP[:PORT]
Bind to this address to listen for connections from Socks-speaking applications. (Default: 127.0.0.1) You can also specify a port (e.g. 192.168.0.1:9100). This directive can be specified multiple times to bind to multiple addresses/ports. (DEPRECATED: As of 0.2.3.x-alpha, you can now use multiple SOCKSPort entries, and provide addresses for SOCKSPort entries, so SOCKSListenAddress no longer has a purpose. For backward compatibility, SOCKSListenAddress is only allowed when SOCKSPort is just a port number.)
SocksPolicy policy,policy,…
Set an entrance policy for this server, to limit who can connect to the SocksPort and DNSPort ports. The policies have the same form as exit policies below.
SocksTimeout NUM
Let a socks connection wait NUM seconds handshaking, and NUM seconds unattached waiting for an appropriate circuit, before we fail it. (Default: 2 minutes)
TokenBucketRefillInterval NUM [msec|second]
Set the refill interval of Tor’s token bucket to NUM milliseconds. NUM must be between 1 and 1000, inclusive. Note that the configured bandwidth limits are still expressed in bytes per second: this option only affects the frequency with which Tor checks to see whether previously exhausted connections may read again. (Default: 100 msec)
TrackHostExits host,.domain,…
For each value in the comma separated list, Tor will track recent connections to hosts that match this value and attempt to reuse the same exit node for each. If the value is prepended with a ‘.’, it is treated as matching an entire domain. If one of the values is just a ‘.’, it means match everything. This option is useful if you frequently connect to sites that will expire all your authentication cookies (i.e. log you out) if your IP address changes. Note that this option does have the disadvantage of making it more clear that a given history is associated with a single user. However, most people who would wish to observe this will observe it through cookies or other protocol-specific means anyhow.
TrackHostExitsExpire NUM
Since exit servers go up and down, it is desirable to expire the association between host and exit server after NUM seconds. The default is 1800 seconds (30 minutes).
UpdateBridgesFromAuthority 0|1
When set (along with UseBridges), Tor will try to fetch bridge descriptors from the configured bridge authorities when feasible. It will fall back to a direct request if the authority responds with a 404. (Default: 0)
UseBridges 0|1
When set, Tor will fetch descriptors for each bridge listed in the “Bridge” config lines, and use these relays as both entry guards and directory guards. (Default: 0)
UseEntryGuards 0|1
If this option is set to 1, we pick a few long-term entry servers, and try to stick with them. This is desirable because constantly changing servers increases the odds that an adversary who owns some servers will observe a fraction of your paths. (Default: 1)
NumEntryGuards NUM
If UseEntryGuards is set to 1, we will try to pick a total of NUM routers as long-term entries for our circuits. (Default: 3)
SafeSocks 0|1
When this option is enabled, Tor will reject application connections that use unsafe variants of the socks protocol — ones that only provide an IP address, meaning the application is doing a DNS resolve first. Specifically, these are socks4 and socks5 when not doing remote DNS. (Default: 0)
TestSocks 0|1
When this option is enabled, Tor will make a notice-level log entry for each connection to the Socks port indicating whether the request used a safe socks protocol or an unsafe one (see above entry on SafeSocks). This helps to determine whether an application using Tor is possibly leaking DNS requests. (Default: 0)
WarnUnsafeSocks 0|1
When this option is enabled, Tor will warn whenever a request is received that only contains an IP address instead of a hostname. Allowing applications to do DNS resolves themselves is usually a bad idea and can leak your location to attackers. (Default: 1)
VirtualAddrNetwork Address/bits
When Tor needs to assign a virtual (unused) address because of a MAPADDRESS command from the controller or the AutomapHostsOnResolve feature, Tor picks an unassigned address from this range. (Default: 127.192.0.0/10)
When providing proxy server service to a network of computers using a tool like dns-proxy-tor, change this address to “10.192.0.0/10″ or “172.16.0.0/12″. The default VirtualAddrNetwork address range on a properly configured machine will route to the loopback interface. For local use, no change to the default VirtualAddrNetwork setting is needed.
AllowNonRFC953Hostnames 0|1
When this option is disabled, Tor blocks hostnames containing illegal characters (like @ and ::__IHACKLOG_REMOTE_IMAGE_AUTODOWN_BLOCK__::0 rather than sending them to an exit node to be resolved. This helps trap accidental attempts to resolve URLs and so on. (Default: 0)
AllowDotExit 0|1
If enabled, we convert “www.google.com.foo.exit” addresses on the SocksPort/TransPort/NATDPort into “www.google.com” addresses that exit from the node “foo”. Disabled by default since attacking websites and exit relays can use it to manipulate your path selection. (Default: 0)
FastFirstHopPK 0|1
When this option is disabled, Tor uses the public key step for the first hop of creating circuits. Skipping it is generally safe since we have already used TLS to authenticate the relay and to establish forward-secure keys. Turning this option off makes circuit building slower.
Note that Tor will always use the public key step for the first hop if it’s operating as a relay, and it will never use the public key step if it doesn’t yet know the onion key of the first hop. (Default: 1)
TransPort [address:]port|auto [isolation flags]
Open this port to listen for transparent proxy connections. Set this to 0 if you don’t want to allow transparent proxy connections. Set the port to “auto” to have Tor pick a port for you. This directive can be specified multiple times to bind to multiple addresses/ports. See SOCKSPort for an explanation of isolation flags.
TransPort requires OS support for transparent proxies, such as BSDs’ pf or Linux’s IPTables. If you’re planning to use Tor as a transparent proxy for a network, you’ll want to examine and change VirtualAddrNetwork from the default setting. You’ll also want to set the TransListenAddress option for the network you’d like to proxy. (Default: 0)
TransListenAddress IP[:PORT]
Bind to this address to listen for transparent proxy connections. (Default: 127.0.0.1). This is useful for exporting a transparent proxy server to an entire network. (DEPRECATED: As of 0.2.3.x-alpha, you can now use multiple TransPort entries, and provide addresses for TransPort entries, so TransListenAddress no longer has a purpose. For backward compatibility, TransListenAddress is only allowed when TransPort is just a port number.)
NATDPort [address:]port|auto [isolation flags]
Open this port to listen for connections from old versions of ipfw (as included in old versions of FreeBSD, etc) using the NATD protocol. Use 0 if you don’t want to allow NATD connections. Set the port to “auto” to have Tor pick a port for you. This directive can be specified multiple times to bind to multiple addresses/ports. See SOCKSPort for an explanation of isolation flags.
This option is only for people who cannot use TransPort. (Default: 0)
NATDListenAddress IP[:PORT]
Bind to this address to listen for NATD connections. (DEPRECATED: As of 0.2.3.x-alpha, you can now use multiple NATDPort entries, and provide addresses for NATDPort entries, so NATDListenAddress no longer has a purpose. For backward compatibility, NATDListenAddress is only allowed when NATDPort is just a port number.)
AutomapHostsOnResolve 0|1
When this option is enabled, and we get a request to resolve an address that ends with one of the suffixes inAutomapHostsSuffixes, we map an unused virtual address to that address, and return the new virtual address. This is handy for making “.onion” addresses work with applications that resolve an address and then connect to it. (Default: 0)
AutomapHostsSuffixes SUFFIX,SUFFIX,…
A comma-separated list of suffixes to use with AutomapHostsOnResolve. The “.” suffix is equivalent to “all addresses.” (Default: .exit,.onion).
DNSPort [address:]port|auto [isolation flags]
If non-zero, open this port to listen for UDP DNS requests, and resolve them anonymously. Set the port to “auto” to have Tor pick a port for you. This directive can be specified multiple times to bind to multiple addresses/ports. See SOCKSPort for an explanation of isolation flags. (Default: 0)
DNSListenAddress IP[:PORT]
Bind to this address to listen for DNS connections. (DEPRECATED: As of 0.2.3.x-alpha, you can now use multiple DNSPort entries, and provide addresses for DNSPort entries, so DNSListenAddress no longer has a purpose. For backward compatibility, DNSListenAddress is only allowed when DNSPort is just a port number.)
ClientDNSRejectInternalAddresses 0|1
If true, Tor does not believe any anonymously retrieved DNS answer that tells it that an address resolves to an internal address (like 127.0.0.1 or 192.168.0.1). This option prevents certain browser-based attacks; don’t turn it off unless you know what you’re doing. (Default: 1)
ClientRejectInternalAddresses 0|1
If true, Tor does not try to fulfill requests to connect to an internal address (like 127.0.0.1 or 192.168.0.1) unless a exit node is specifically requested (for example, via a .exit hostname, or a controller request). (Default: 1)
DownloadExtraInfo 0|1
If true, Tor downloads and caches “extra-info” documents. These documents contain information about servers other than the information in their regular router descriptors. Tor does not use this information for anything itself; to save bandwidth, leave this option turned off. (Default: 0)
FallbackNetworkstatusFile FILENAME
If Tor doesn’t have a cached networkstatus file, it starts out using this one instead. Even if this file is out of date, Tor can still use it to learn about directory mirrors, so it doesn’t need to put load on the authorities. (Default: None)
WarnPlaintextPorts port,port,…
Tells Tor to issue a warnings whenever the user tries to make an anonymous connection to one of these ports. This option is designed to alert users to services that risk sending passwords in the clear. (Default: 23,109,110,143)
RejectPlaintextPorts port,port,…
Like WarnPlaintextPorts, but instead of warning about risky port uses, Tor will instead refuse to make the connection. (Default: None)
AllowSingleHopCircuits 0|1
When this option is set, the attached Tor controller can use relays that have the AllowSingleHopExits option turned on to build one-hop Tor connections. (Default: 0)
OptimisticData 0|1|auto
When this option is set, and Tor is using an exit node that supports the feature, it will try optimistically to send data to the exit node without waiting for the exit node to report whether the connection succeeded. This can save a round-trip time for protocols like HTTP where the client talks first. If OptimisticData is set to auto, Tor will look at the UseOptimisticData parameter in the networkstatus. (Default: auto)
Tor2webMode 0|1
When this option is set, Tor connects to hidden services non-anonymously. This option also disables client connections to non-hidden-service hostnames through Tor. It must only be used when running a tor2web Hidden Service web proxy. To enable this option the compile time flag –enable-tor2webmode must be specified. (Default: 0)
UseMicrodescriptors 0|1|auto
Microdescriptors are a smaller version of the information that Tor needs in order to build its circuits. Using microdescriptors makes Tor clients download less directory information, thus saving bandwidth. Directory caches need to fetch regular descriptors and microdescriptors, so this option doesn’t save any bandwidth for them. If this option is set to “auto” (recommended) then it is on for all clients that do not set FetchUselessDescriptors. (Default: auto)
PathBiasCircThreshold NUM
PathBiasNoticeRate NUM
PathBiasDisableRate NUM
PathBiasScaleThreshold NUM
PathBiasScaleFactor NUM
These options override the default behavior of Tor’s (currently experimental) path bias detection algorithm. To try to find broken or misbehaving guard nodes, Tor looks for nodes where more than a certain fraction of circuits through that node fail after the first hop. The PathBiasCircThreshold option controls how many circuits we need to build through a guard before we make these checks. The PathBiasNoticeRate and PathBiasDisableRate options control what fraction of circuits must succeed through a guard so we won’t warn about it or disable it, respectively. When we have seen more than PathBiasScaleThreshold circuits through a guard, we divide our observations by PathBiasScaleFactor, so that new observations don’t get swamped by old ones.
By default, or if a negative value is provided for one of these options, Tor uses reasonable defaults from the networkstatus consensus document. If no defaults are available there, these options default to 20, .70, 0.0, 200, and 4 respectively.
SERVER OPTIONS
The following options are useful only for servers (that is, if ORPort is non-zero):
Address address
The IP address or fully qualified domain name of this server (e.g. moria.mit.edu). You can leave this unset, and Tor will guess your IP address. This IP address is the one used to tell clients and other servers where to find your Tor server; it doesn’t affect the IP that your Tor client binds to. To bind to a different address, use the *ListenAddress and OutboundBindAddress options.
AllowSingleHopExits 0|1
This option controls whether clients can use this server as a single hop proxy. If set to 1, clients can use this server as an exit even if it is the only hop in the circuit. Note that most clients will refuse to use servers that set this option, since most clients have ExcludeSingleHopRelays set. (Default: 0)
AssumeReachable 0|1
This option is used when bootstrapping a new Tor network. If set to 1, don’t do self-reachability testing; just upload your server descriptor immediately. If AuthoritativeDirectory is also set, this option instructs the dirserver to bypass remote reachability testing too and list all connected servers as running.
BridgeRelay 0|1
Sets the relay to act as a “bridge” with respect to relaying connections from bridge users to the Tor network. It mainly causes Tor to publish a server descriptor to the bridge database, rather than publishing a relay descriptor to the public directory authorities.
ContactInfo email_address
Administrative contact information for server. This line might get picked up by spam harvesters, so you may want to obscure the fact that it’s an email address.
ExitPolicy policy,policy,…
Set an exit policy for this server. Each policy is of the form “accept|reject ADDR[/MASK][:PORT]“. If /MASK is omitted then this policy just applies to the host given. Instead of giving a host or network you can also use “*” to denote the universe (0.0.0.0/0). PORT can be a single port number, an interval of ports “FROM_PORT-TO_PORT“, or “*”. If PORT is omitted, that means “*”.
For example, “accept 18.7.22.69:*,reject 18.0.0.0/8:*,accept *:*” would reject any traffic destined for MIT except for web.mit.edu, and accept anything else.
To specify all internal and link-local networks (including 0.0.0.0/8, 169.254.0.0/16, 127.0.0.0/8, 192.168.0.0/16, 10.0.0.0/8, and 172.16.0.0/12), you can use the “private” alias instead of an address. These addresses are rejected by default (at the beginning of your exit policy), along with your public IP address, unless you set the ExitPolicyRejectPrivate config option to 0. For example, once you’ve done that, you could allow HTTP to 127.0.0.1 and block all other connections to internal networks with “accept 127.0.0.1:80,reject private:*”, though that may also allow connections to your own computer that are addressed to its public (external) IP address. See RFC 1918 and RFC 3330 for more details about internal and reserved IP address space.
This directive can be specified multiple times so you don’t have to put it all on one line.
Policies are considered first to last, and the first match wins. If you want to _replace_ the default exit policy, end your exit policy with either a reject *:* or an accept *:*. Otherwise, you’re _augmenting_ (prepending to) the default exit policy. The default exit policy is:
reject *:25
reject *:119
reject *:135-139
reject *:445
reject *:563
reject *:1214
reject *:4661-4666
reject *:6346-6429
reject *:6699
reject *:6881-6999
accept *:*
ExitPolicyRejectPrivate 0|1
Reject all private (local) networks, along with your own public IP address, at the beginning of your exit policy. See above entry on ExitPolicy. (Default: 1)
MaxOnionsPending NUM
If you have more than this number of onionskins queued for decrypt, reject new ones. (Default: 100)
MyFamily node,node,…
Declare that this Tor server is controlled or administered by a group or organization identical or similar to that of the other servers, defined by their identity fingerprints or nicknames. When two servers both declare that they are in the same ‘family’, Tor clients will not use them in the same circuit. (Each server only needs to list the other servers in its family; it doesn’t need to list itself, but it won’t hurt.) Do not list any bridge relay as it would compromise its concealment.
Nickname name
Set the server’s nickname to ‘name’. Nicknames must be between 1 and 19 characters inclusive, and must contain only the characters [a-zA-Z0-9].
NumCPUs num
How many processes to use at once for decrypting onionskins and other parallelizable operations. If this is set to 0, Tor will try to detect how many CPUs you have, defaulting to 1 if it can’t tell. (Default: 0)
ORPort [address:]PORT|auto [flags]
Advertise this port to listen for connections from Tor clients and servers. This option is required to be a Tor server. Set it to “auto” to have Tor pick a port for you. Set it to 0 to not run an ORPort at all. This option can occur more than once. (Default: 0)
Tor recognizes these flags on each ORPort:
**NoAdvertise**::
By default, we bind to a port and tell our users about it. If
NoAdvertise is specified, we don’t advertise, but listen anyway. This
can be useful if the port everybody will be connecting to (for
example, one that’s opened on our firewall) is somewhere else.
**NoListen**::
By default, we bind to a port and tell our users about it. If
NoListen is specified, we don’t bind, but advertise anyway. This
can be useful if something else (for example, a firewall’s port
forwarding configuration) is causing connections to reach us.
**IPv4Only**::
If the address is absent, or resolves to both an IPv4 and an IPv6
address, only listen to the IPv4 address.
**IPv6Only**::
If the address is absent, or resolves to both an IPv4 and an IPv6
address, only listen to the IPv6 address.
For obvious reasons, NoAdvertise and NoListen are mutually exclusive, and
IPv4Only and IPv6Only are mutually exclusive.
ORListenAddress IP[:PORT]
Bind to this IP address to listen for connections from Tor clients and servers. If you specify a port, bind to this port rather than the one specified in ORPort. (Default: 0.0.0.0) This directive can be specified multiple times to bind to multiple addresses/ports.
This option is deprecated; you can get the same behavior with ORPort now
that it supports NoAdvertise and explicit addresses.
PortForwarding 0|1
Attempt to automatically forward the DirPort and ORPort on a NAT router connecting this Tor server to the Internet. If set, Tor will try both NAT-PMP (common on Apple routers) and UPnP (common on routers from other manufacturers). (Default: 0)
PortForwardingHelper filename|pathname
If PortForwarding is set, use this executable to configure the forwarding. If set to a filename, the system path will be searched for the executable. If set to a path, only the specified path will be executed. (Default: tor-fw-helper)
PublishServerDescriptor 0|1|v1|v2|v3|bridge,…
This option specifies which descriptors Tor will publish when acting as a relay. You can choose multiple arguments, separated by commas.
If this option is set to 0, Tor will not publish its descriptors to any directories. (This is useful if you’re testing out your server, or if you’re using a Tor controller that handles directory publishing for you.) Otherwise, Tor will publish its descriptors of all type(s) specified. The default is “1″, which means “if running as a server, publish the appropriate descriptors to the authorities”.
ShutdownWaitLength NUM
When we get a SIGINT and we’re a server, we begin shutting down: we close listeners and start refusing new circuits. After NUM seconds, we exit. If we get a second SIGINT, we exit immedi- ately. (Default: 30 seconds)
HeartbeatPeriod N minutes|hours|days|weeks
Log a heartbeat message every HeartbeatPeriod seconds. This is a log level info message, designed to let you know your Tor server is still alive and doing useful things. Settings this to 0 will disable the heartbeat. (Default: 6 hours)
AccountingMax N bytes|KB|MB|GB|TB
Never send more than the specified number of bytes in a given accounting period, or receive more than that number in the period. For example, with AccountingMax set to 1 GB, a server could send 900 MB and receive 800 MB and continue running. It will only hibernate once one of the two reaches 1 GB. When the number of bytes gets low, Tor will stop accepting new connections and circuits. When the number of bytes is exhausted, Tor will hibernate until some time in the next accounting period. To prevent all servers from waking at the same time, Tor will also wait until a random point in each period before waking up. If you have bandwidth cost issues, enabling hibernation is preferable to setting a low bandwidth, since it provides users with a collection of fast servers that are up some of the time, which is more useful than a set of slow servers that are always “available”.
AccountingStart day|week|month [day] HH:MM
Specify how long accounting periods last. If month is given, each accounting period runs from the time HH:MMon the dayth day of one month to the same day and time of the next. (The day must be between 1 and 28.) Ifweek is given, each accounting period runs from the time HH:MM of the dayth day of one week to the same day and time of the next week, with Monday as day 1 and Sunday as day 7. If day is given, each accounting period runs from the time HH:MM each day to the same time on the next day. All times are local, and given in 24-hour time. (Default: “month 1 0:00″)
RefuseUnknownExits 0|1|auto
Prevent nodes that don’t appear in the consensus from exiting using this relay. If the option is 1, we always block exit attempts from such nodes; if it’s 0, we never do, and if the option is “auto”, then we do whatever the authorities suggest in the consensus. (Default: auto)
ServerDNSResolvConfFile filename
Overrides the default DNS configuration with the configuration in filename. The file format is the same as the standard Unix “resolv.conf” file (7). This option, like all other ServerDNS options, only affects name lookups that your server does on behalf of clients. (Defaults to use the system DNS configuration.)
ServerDNSAllowBrokenConfig 0|1
If this option is false, Tor exits immediately if there are problems parsing the system DNS configuration or connecting to nameservers. Otherwise, Tor continues to periodically retry the system nameservers until it eventually succeeds. (Default: 1)
ServerDNSSearchDomains 0|1
If set to 1, then we will search for addresses in the local search domain. For example, if this system is configured to believe it is in “example.com”, and a client tries to connect to “www”, the client will be connected to “www.example.com”. This option only affects name lookups that your server does on behalf of clients. (Default: 0)
ServerDNSDetectHijacking 0|1
When this option is set to 1, we will test periodically to determine whether our local nameservers have been configured to hijack failing DNS requests (usually to an advertising site). If they are, we will attempt to correct this. This option only affects name lookups that your server does on behalf of clients. (Default: 1)
ServerDNSTestAddresses address,address,…
When we’re detecting DNS hijacking, make sure that these valid addresses aren’t getting redirected. If they are, then our DNS is completely useless, and we’ll reset our exit policy to “reject :“. This option only affects name lookups that your server does on behalf of clients. (Default: “www.google.com, www.mit.edu, www.yahoo.com, www.slashdot.org”)
ServerDNSAllowNonRFC953Hostnames 0|1
When this option is disabled, Tor does not try to resolve hostnames containing illegal characters (like @ and ::__IHACKLOG_REMOTE_IMAGE_AUTODOWN_BLOCK__::1 rather than sending them to an exit node to be resolved. This helps trap accidental attempts to resolve URLs and so on. This option only affects name lookups that your server does on behalf of clients. (Default: 0)
BridgeRecordUsageByCountry 0|1
When this option is enabled and BridgeRelay is also enabled, and we have GeoIP data, Tor keeps a keep a per-country count of how many client addresses have contacted it so that it can help the bridge authority guess which countries have blocked access to it. (Default: 1)
ServerDNSRandomizeCase 0|1
When this option is set, Tor sets the case of each character randomly in outgoing DNS requests, and makes sure that the case matches in DNS replies. This so-called “0×20 hack” helps resist some types of DNS poisoning attack. For more information, see “Increased DNS Forgery Resistance through 0×20-Bit Encoding”. This option only affects name lookups that your server does on behalf of clients. (Default: 1)
GeoIPFile filename
A filename containing GeoIP data, for use with BridgeRecordUsageByCountry.
CellStatistics 0|1
When this option is enabled, Tor writes statistics on the mean time that cells spend in circuit queues to disk every 24 hours. (Default: 0)
DirReqStatistics 0|1
When this option is enabled, a Tor directory writes statistics on the number and response time of network status requests to disk every 24 hours. (Default: 1)
EntryStatistics 0|1
When this option is enabled, Tor writes statistics on the number of directly connecting clients to disk every 24 hours. (Default: 0)
ExitPortStatistics 0|1
When this option is enabled, Tor writes statistics on the number of relayed bytes and opened stream per exit port to disk every 24 hours. (Default: 0)
ConnDirectionStatistics 0|1
When this option is enabled, Tor writes statistics on the bidirectional use of connections to disk every 24 hours. (Default: 0)
ExtraInfoStatistics 0|1
When this option is enabled, Tor includes previously gathered statistics in its extra-info documents that it uploads to the directory authorities. (Default: 1)
ExtendAllowPrivateAddresses 0|1
When this option is enabled, Tor routers allow EXTEND request to localhost, RFC1918 addresses, and so on. This can create security issues; you should probably leave it off. (Default: 0)
DIRECTORY SERVER OPTIONS
The following options are useful only for directory servers (that is, if DirPort is non-zero):
AuthoritativeDirectory 0|1
When this option is set to 1, Tor operates as an authoritative directory server. Instead of caching the directory, it generates its own list of good servers, signs it, and sends that to the clients. Unless the clients already have you listed as a trusted directory, you probably do not want to set this option. Please coordinate with the other admins at [email protected] if you think you should be a directory.
DirPortFrontPage FILENAME
When this option is set, it takes an HTML file and publishes it as “/” on the DirPort. Now relay operators can provide a disclaimer without needing to set up a separate webserver. There’s a sample disclaimer in contrib/tor-exit-notice.html.
V1AuthoritativeDirectory 0|1
When this option is set in addition to AuthoritativeDirectory, Tor generates version 1 directory and running-routers documents (for legacy Tor clients up to 0.1.0.x).
V2AuthoritativeDirectory 0|1
When this option is set in addition to AuthoritativeDirectory, Tor generates version 2 network statuses and serves descriptors, etc as described in doc/spec/dir-spec-v2.txt (for Tor clients and servers running 0.1.1.x and 0.1.2.x).
V3AuthoritativeDirectory 0|1
When this option is set in addition to AuthoritativeDirectory, Tor generates version 3 network statuses and serves descriptors, etc as described in doc/spec/dir-spec.txt (for Tor clients and servers running at least 0.2.0.x).
VersioningAuthoritativeDirectory 0|1
When this option is set to 1, Tor adds information on which versions of Tor are still believed safe for use to the published directory. Each version 1 authority is automatically a versioning authority; version 2 authorities provide this service optionally. See RecommendedVersions, RecommendedClientVersions, andRecommendedServerVersions.
NamingAuthoritativeDirectory 0|1
When this option is set to 1, then the server advertises that it has opinions about nickname-to-fingerprint bindings. It will include these opinions in its published network-status pages, by listing servers with the flag “Named” if a correct binding between that nickname and fingerprint has been registered with the dirserver. Naming dirservers will refuse to accept or publish descriptors that contradict a registered binding. See approved-routers in theFILES section below.
HSAuthoritativeDir 0|1
When this option is set in addition to AuthoritativeDirectory, Tor also accepts and serves v0 hidden service descriptors, which are produced and used by Tor 0.2.1.x and older. (Default: 0)
HidServDirectoryV2 0|1
When this option is set, Tor accepts and serves v2 hidden service descriptors. Setting DirPort is not required for this, because clients connect via the ORPort by default. (Default: 1)
BridgeAuthoritativeDir 0|1
When this option is set in addition to AuthoritativeDirectory, Tor accepts and serves router descriptors, but it caches and serves the main networkstatus documents rather than generating its own. (Default: 0)
MinUptimeHidServDirectoryV2 N seconds|minutes|hours|days|weeks
Minimum uptime of a v2 hidden service directory to be accepted as such by authoritative directories. (Default: 25 hours)
DirPort [address:]PORT|auto [flags]
If this option is nonzero, advertise the directory service on this port. Set it to “auto” to have Tor pick a port for you. This option can occur more than once. (Default: 0)
The same flags are supported here as are supported by ORPort.
DirListenAddress IP[:PORT]
Bind the directory service to this address. If you specify a port, bind to this port rather than the one specified in DirPort. (Default: 0.0.0.0) This directive can be specified multiple times to bind to multiple addresses/ports.
This option is deprecated; you can get the same behavior with DirPort now
that it supports NoAdvertise and explicit addresses.
DirPolicy policy,policy,…
Set an entrance policy for this server, to limit who can connect to the directory ports. The policies have the same form as exit policies above.
FetchV2Networkstatus 0|1
If set, we try to fetch the (obsolete, unused) version 2 network status consensus documents from the directory authorities. No currently supported Tor version uses them. (Default: 0)
DIRECTORY AUTHORITY SERVER OPTIONS
RecommendedVersions STRING
STRING is a comma-separated list of Tor versions currently believed to be safe. The list is included in each directory, and nodes which pull down the directory learn whether they need to upgrade. This option can appear multiple times: the values from multiple lines are spliced together. When this is set thenVersioningAuthoritativeDirectory should be set too.
RecommendedClientVersions STRING
STRING is a comma-separated list of Tor versions currently believed to be safe for clients to use. This information is included in version 2 directories. If this is not set then the value of RecommendedVersions is used. When this is set then VersioningAuthoritativeDirectory should be set too.
RecommendedServerVersions STRING
STRING is a comma-separated list of Tor versions currently believed to be safe for servers to use. This information is included in version 2 directories. If this is not set then the value of RecommendedVersions is used. When this is set then VersioningAuthoritativeDirectory should be set too.
ConsensusParams STRING
STRING is a space-separated list of key=value pairs that Tor will include in the “params” line of its networkstatus vote.
DirAllowPrivateAddresses 0|1
If set to 1, Tor will accept router descriptors with arbitrary “Address” elements. Otherwise, if the address is not an IP address or is a private IP address, it will reject the router descriptor. (Default: 0)
AuthDirBadDir AddressPattern…
Authoritative directories only. A set of address patterns for servers that will be listed as bad directories in any network status document this authority publishes, if AuthDirListBadDirs is set.
AuthDirBadExit AddressPattern…
Authoritative directories only. A set of address patterns for servers that will be listed as bad exits in any network status document this authority publishes, if AuthDirListBadExits is set.
AuthDirInvalid AddressPattern…
Authoritative directories only. A set of address patterns for servers that will never be listed as “valid” in any network status document that this authority publishes.
AuthDirReject AddressPattern…
Authoritative directories only. A set of address patterns for servers that will never be listed at all in any network status document that this authority publishes, or accepted as an OR address in any descriptor submitted for publication by this authority.
AuthDirBadDirCCs CC,…
AuthDirBadExitCCs CC,…
AuthDirInvalidCCs CC,…
AuthDirRejectCCs CC,…
Authoritative directories only. These options contain a comma-separated list of country codes such that any server in one of those country codes will be marked as a bad directory/bad exit/invalid for use, or rejected entirely.
AuthDirListBadDirs 0|1
Authoritative directories only. If set to 1, this directory has some opinion about which nodes are unsuitable as directory caches. (Do not set this to 1 unless you plan to list non-functioning directories as bad; otherwise, you are effectively voting in favor of every declared directory.)
AuthDirListBadExits 0|1
Authoritative directories only. If set to 1, this directory has some opinion about which nodes are unsuitable as exit nodes. (Do not set this to 1 unless you plan to list non-functioning exits as bad; otherwise, you are effectively voting in favor of every declared exit as an exit.)
AuthDirRejectUnlisted 0|1
Authoritative directories only. If set to 1, the directory server rejects all uploaded server descriptors that aren’t explicitly listed in the fingerprints file. This acts as a “panic button” if we get hit with a Sybil attack. (Default: 0)
AuthDirMaxServersPerAddr NUM
Authoritative directories only. The maximum number of servers that we will list as acceptable on a single IP address. Set this to “0″ for “no limit”. (Default: 2)
AuthDirMaxServersPerAuthAddr NUM
Authoritative directories only. Like AuthDirMaxServersPerAddr, but applies to addresses shared with directory authorities. (Default: 5)
AuthDirFastGuarantee N bytes|KB|MB|GB
Authoritative directories only. If non-zero, always vote the Fast flag for any relay advertising this amount of capacity or more. (Default: 100 KB)
AuthDirGuardBWGuarantee N bytes|KB|MB|GB
Authoritative directories only. If non-zero, this advertised capacity or more is always sufficient to satisfy the bandwidth requirement for the Guard flag. (Default: 250 KB)
BridgePassword Password
If set, contains an HTTP authenticator that tells a bridge authority to serve all requested bridge information. Used by the (only partially implemented) “bridge community” design, where a community of bridge relay operators all use an alternate bridge directory authority, and their target user audience can periodically fetch the list of available community bridges to stay up-to-date. (Default: not set)
V3AuthVotingInterval N minutes|hours
V3 authoritative directories only. Configures the server’s preferred voting interval. Note that voting will actuallyhappen at an interval chosen by consensus from all the authorities’ preferred intervals. This time SHOULD divide evenly into a day. (Default: 1 hour)
V3AuthVoteDelay N minutes|hours
V3 authoritative directories only. Configures the server’s preferred delay between publishing its vote and assuming it has all the votes from all the other authorities. Note that the actual time used is not the server’s preferred time, but the consensus of all preferences. (Default: 5 minutes)
V3AuthDistDelay N minutes|hours
V3 authoritative directories only. Configures the server’s preferred delay between publishing its consensus and signature and assuming it has all the signatures from all the other authorities. Note that the actual time used is not the server’s preferred time, but the consensus of all preferences. (Default: 5 minutes)
V3AuthNIntervalsValid NUM
V3 authoritative directories only. Configures the number of VotingIntervals for which each consensus should be valid for. Choosing high numbers increases network partitioning risks; choosing low numbers increases directory traffic. Note that the actual number of intervals used is not the server’s preferred number, but the consensus of all preferences. Must be at least 2. (Default: 3)
V3BandwidthsFile FILENAME
V3 authoritative directories only. Configures the location of the bandwidth-authority generated file storing information on relays’ measured bandwidth capacities. (Default: unset)
V3AuthUseLegacyKey 0|1
If set, the directory authority will sign consensuses not only with its own signing key, but also with a “legacy” key and certificate with a different identity. This feature is used to migrate directory authority keys in the event of a compromise. (Default: 0)
RephistTrackTime N seconds|minutes|hours|days|weeks
Tells an authority, or other node tracking node reliability and history, that fine-grained information about nodes can be discarded when it hasn’t changed for a given amount of time. (Default: 24 hours)
VoteOnHidServDirectoriesV2 0|1
When this option is set in addition to AuthoritativeDirectory, Tor votes on whether to accept relays as hidden service directories. (Default: 1)
HIDDEN SERVICE OPTIONS
The following options are used to configure a hidden service.
HiddenServiceDir DIRECTORY
Store data files for a hidden service in DIRECTORY. Every hidden service must have a separate directory. You may use this option multiple times to specify multiple services. DIRECTORY must be an existing directory.
HiddenServicePort VIRTPORT [TARGET]
Configure a virtual port VIRTPORT for a hidden service. You may use this option multiple times; each time applies to the service using the most recent hiddenservicedir. By default, this option maps the virtual port to the same port on 127.0.0.1 over TCP. You may override the target port, address, or both by specifying a target of addr, port, or addr:port. You may also have multiple lines with the same VIRTPORT: when a user connects to that VIRTPORT, one of the TARGETs from those lines will be chosen at random.
PublishHidServDescriptors 0|1
If set to 0, Tor will run any hidden services you configure, but it won’t advertise them to the rendezvous directory. This option is only useful if you’re using a Tor controller that handles hidserv publishing for you. (Default: 1)
HiddenServiceVersion version,version,…
A list of rendezvous service descriptor versions to publish for the hidden service. Currently, only version 2 is supported. (Default: 2)
HiddenServiceAuthorizeClient auth-type client-name,client-name,…
If configured, the hidden service is accessible for authorized clients only. The auth-type can either be ‘basic’ for a general-purpose authorization protocol or ‘stealth’ for a less scalable protocol that also hides service activity from unauthorized clients. Only clients that are listed here are authorized to access the hidden service. Valid client names are 1 to 19 characters long and only use characters in A-Za-z0-9+-_ (no spaces). If this option is set, the hidden service is not accessible for clients without authorization any more. Generated authorization data can be found in the hostname file. Clients need to put this authorization data in their configuration file using HidServAuth.
RendPostPeriod N seconds|minutes|hours|days|weeks
Every time the specified period elapses, Tor uploads any rendezvous service descriptors to the directory servers. This information is also uploaded whenever it changes. (Default: 1 hour)
TESTING NETWORK OPTIONS
The following options are used for running a testing Tor network.
TestingTorNetwork 0|1
If set to 1, Tor adjusts default values of the configuration options below, so that it is easier to set up a testing Tor network. May only be set if non-default set of DirServers is set. Cannot be unset while Tor is running. (Default: 0)
ServerDNSAllowBrokenConfig 1
DirAllowPrivateAddresses 1
EnforceDistinctSubnets 0
AssumeReachable 1
AuthDirMaxServersPerAddr 0
AuthDirMaxServersPerAuthAddr 0
ClientDNSRejectInternalAddresses 0
ClientRejectInternalAddresses 0
CountPrivateBandwidth 1
ExitPolicyRejectPrivate 0
ExtendAllowPrivateAddresses 1
V3AuthVotingInterval 5 minutes
V3AuthVoteDelay 20 seconds
V3AuthDistDelay 20 seconds
MinUptimeHidServDirectoryV2 0 seconds
TestingV3AuthInitialVotingInterval 5 minutes
TestingV3AuthInitialVoteDelay 20 seconds
TestingV3AuthInitialDistDelay 20 seconds
TestingAuthDirTimeToLearnReachability 0 minutes
TestingEstimatedDescriptorPropagationTime 0 minutes
TestingV3AuthInitialVotingInterval N minutes|hours
Like V3AuthVotingInterval, but for initial voting interval before the first consensus has been created. Changing this requires that TestingTorNetwork is set. (Default: 30 minutes)
TestingV3AuthInitialVoteDelay N minutes|hours
Like TestingV3AuthInitialVoteDelay, but for initial voting interval before the first consensus has been created. Changing this requires that TestingTorNetwork is set. (Default: 5 minutes)
TestingV3AuthInitialDistDelay N minutes|hours
Like TestingV3AuthInitialDistDelay, but for initial voting interval before the first consensus has been created. Changing this requires that TestingTorNetwork is set. (Default: 5 minutes)
TestingAuthDirTimeToLearnReachability N minutes|hours
After starting as an authority, do not make claims about whether routers are Running until this much time has passed. Changing this requires that TestingTorNetwork is set. (Default: 30 minutes)
TestingEstimatedDescriptorPropagationTime N minutes|hours
Clients try downloading router descriptors from directory caches after this time. Changing this requires thatTestingTorNetwork is set. (Default: 10 minutes)
SIGNALS
Tor catches the following signals:
SIGTERM
Tor will catch this, clean up and sync to disk if necessary, and exit.
SIGINT
Tor clients behave as with SIGTERM; but Tor servers will do a controlled slow shutdown, closing listeners and waiting 30 seconds before exiting. (The delay can be configured with the ShutdownWaitLength config option.)
SIGHUP
The signal instructs Tor to reload its configuration (including closing and reopening logs), and kill and restart its helper processes if applicable.
SIGUSR1
Log statistics about current connections, past connections, and throughput.
SIGUSR2
Switch all logs to loglevel debug. You can go back to the old loglevels by sending a SIGHUP.
SIGCHLD
Tor receives this signal when one of its helper processes has exited, so it can clean up.
SIGPIPE
Tor catches this signal and ignores it.
SIGXFSZ
If this signal exists on your platform, Tor catches and ignores it.
FILES
@CONFDIR@/torrc
The configuration file, which contains “option value” pairs.
@LOCALSTATEDIR@/lib/tor/
The tor process stores keys and other data here.
DataDirectory/cached-status/
The most recently downloaded network status document for each authority. Each file holds one such document; the filenames are the hexadecimal identity key fingerprints of the directory authorities. Mostly obsolete.
DataDirectory/cached-consensus and/or cached-microdesc-consensus
The most recent consensus network status document we’ve downloaded.
DataDirectory/cached-descriptors and cached-descriptors.new
These files hold downloaded router statuses. Some routers may appear more than once; if so, the most recently published descriptor is used. Lines beginning with @-signs are annotations that contain more information about a given router. The “.new” file is an append-only journal; when it gets too large, all entries are merged into a new cached-descriptors file.
DataDirectory/cached-microdescs and cached-microdescs.new
These files hold downloaded microdescriptors. Lines beginning with @-signs are annotations that contain more information about a given router. The “.new” file is an append-only journal; when it gets too large, all entries are merged into a new cached-microdescs file.
DataDirectory/cached-routers and cached-routers.new
Obsolete versions of cached-descriptors and cached-descriptors.new. When Tor can’t find the newer files, it looks here instead.
DataDirectory/state
A set of persistent key-value mappings. These are documented in the file. These include:
The current entry guards and their status.
The current bandwidth accounting values (unused so far; see below).
When the file was last written
What version of Tor generated the state file
A short history of bandwidth usage, as produced in the router descriptors.
DataDirectory/bw_accounting
Used to track bandwidth accounting values (when the current period starts and ends; how much has been read and written so far this period). This file is obsolete, and the data is now stored in the ‘state’ file as well. Only used when bandwidth accounting is enabled.
DataDirectory/control_auth_cookie
Used for cookie authentication with the controller. Location can be overridden by the CookieAuthFile config option. Regenerated on startup. See control-spec.txt for details. Only used when cookie authentication is enabled.
DataDirectory/keys/*
Only used by servers. Holds identity keys and onion keys.
DataDirectory/fingerprint
Only used by servers. Holds the fingerprint of the server’s identity key.
DataDirectory/approved-routers
Only for naming authoritative directory servers (see NamingAuthoritativeDirectory). This file lists nickname to identity bindings. Each line lists a nickname and a fingerprint separated by whitespace. See your fingerprint file in the DataDirectory for an example line. If the nickname is !reject then descriptors from the given identity (fingerprint) are rejected by this server. If it is !invalid then descriptors are accepted but marked in the directory as not valid, that is, not recommended.
DataDirectory/router-stability
Only used by authoritative directory servers. Tracks measurements for router mean-time-between-failures so that authorities have a good idea of how to set their Stable flags.
HiddenServiceDirectory/hostname
The <base32-encoded-fingerprint>.onion domain name for this hidden service. If the hidden service is restricted to authorized clients only, this file also contains authorization data for all clients.
HiddenServiceDirectory/private_key
The private key for this hidden service.
HiddenServiceDirectory/client_keys
Authorization data for a hidden service that is only accessible by authorized clients.
SEE ALSO
privoxy(1), tsocks(1), torify(1)
https://www.torproject.org/
BUGS
Plenty, probably. Tor is still in development. Please report them.
AUTHORS
Roger Dingledine [arma at mit.edu], Nick Mathewson [nickm at alum.mit.edu].