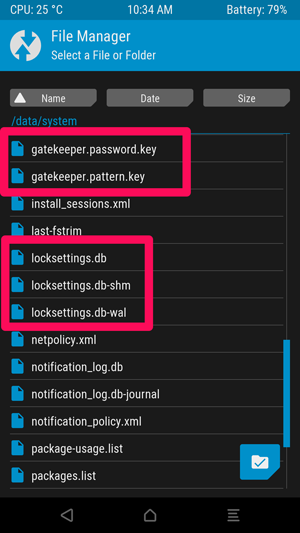
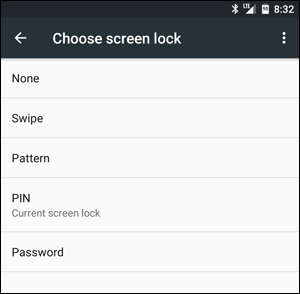
K30Pro/Poco F2 Pro/lmi刷LineageOS

0.备份数据,解锁,去除开机密码

1.更新固件

firmware

https://xiaomifirmwareupdater.com/firmware/lmi/

vendor/

https://xiaomifirmwareupdater.com/archive/vendor/lmi/

2.刷TWRP

原文:https://forum.xda-developers.com/t/firmware-xiaomi-redmi-k30-pro-poco-f2-pro-lmi-auto-updated.4250275/

原作:MBsRoom

Team Win Recovery Project 3.x, or twrp3 for short, is a custom recovery built with ease of use and customization in mind. Its a fully touch driven user interface no more volume rocker or power buttons to mash. The GUI is also fully XML driven and completely theme-able. You can change just about every aspect of the look and feel.

Code:

Code:
/*
*
* We are not responsible for bricked devices, dead SD cards,
* thermonuclear war, or you getting fired because the alarm app failed. Please
* do some research if you have any concerns about features included in this ROM
* before flashing it! YOU are choosing to make these modifications, and if
* you point the finger at us for messing up your device, we will laugh at you.
*
*/

Features:
– Decryption work
– Otg work
-Vibrator
– Zip Flash
– Mtp/adb
– F2FS support
– Fastbootd
– Adb sideload
– Backup restore and images flash

Not working:
-Tell me

INSTALLATION:
1. Download the TWRP image file to your PC.
2. Put your device into fastboot.
3. Type the following command to flash the recovery:-

Code:
fastboot flash recovery "name_of_recovery.img"

4. On installation of TWRP , to boot the recovery do:-

Code:
fastboot boot "name_of_recovery.img"

The device will automatically reboot into TWRP.

5-A. You are using Xiaomi.eu Miui or custom Rom?
You can enjoy with a functional Data Decrypt

5-B You are using Miui EEA – Global -Cn or any custom rom that doesn’t ship custom vbmeta.

6. Download this zip, copy by pc or using otg and flash this zip that will prevent twrp replacing.​
7. Download VbMeta and flash by fastboot​
Code:
fastboot --disable-verity --disable-verification flash vbmeta vbmeta.img"
7. Reboot into twrp (Take longer Time) 
Code:
fastboot boot "name_of_recovery.img"
8. Format Data and Reboot​

NOTES:
By Command fastboot boot, recovery will decrypt everytimes you need, also with Global Rom and without patched vbmeta.

Download:
TWRP

https://sourceforge.net/projects/mbroms/files/TWRPLMI/

VbMeta

https://sourceforge.net/projects/mbroms/files/TWRP/vbmeta.img/download

(Version tag will follow vendor, a lower version tag than your vendor does not mean that recovery will not work)

Kernel Source: HERE

Donation:
PayPal: paypal.me/manuelbiancodev

Telegram Group: @MBsRoom

3.刷LineageOS

3.1解锁,去除开机密码!!

3.2刷LineageOS

18.1

原文:https://forum.xda-developers.com/t/rom-r-official-lineageos-18-1-for-poco-f2-pro-redmi-k30-pro-redmi-k30-pro-zoom-edition-lmi.4203885/

LineageOS is a free, community built, aftermarket firmware distribution of Android 11.0 (R), which is designed to increase performance and reliability over stock Android for your device.

LineageOS is based on the Android Open Source Project with extra contributions from many people within the Android community. It can be used without any need to have any Google application installed. Linked below is a package that has come from another Android project that restore the Google parts. LineageOS does still include various hardware-specific code, which is also slowly being open-sourced anyway.

All the source code for LineageOS is available in the LineageOS Github repo. And if you would like to contribute to LineageOS, please visit out Gerrit Code Review. You can also view the Changelog for a full list of changes & features.

Downloads

https://download.lineageos.org/lmi

Flashing instructions

https://wiki.lineageos.org/devices/lmi/install

Sources:
LineageOS

Happy modding!

3.3 进入系统

如果无法进入系统,可能刷机前没有去除设备密码。重启至twrp,format date分区

3.3 刷OpenGAPP,magisk
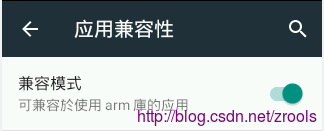
 

3.3 安装google相机

https://www.celsoazevedo.com/files/android/google-camera/dev-arnova8G2/f/dl2/

https://www.celsoazevedo.com/files/android/google-camera/f/configs-arnova-09/


Trouble Shooting

通讯录无法同步解决方案

google play service和google play给予通讯录的权限

WPS Pro For Android


官网介绍地址:http://mo.wps.cn/pc-app/office-pro.html#pro_hp_contact

WPS Office for Android专业版下载地址:http://mo.wps.cn/pc-app/Android/moffice_11.4.1_default_ProCn00110_multidex_c88969cc5ef.apk

移动版激活码:

R8R8P-MTT6F-KLRPM-J7CAB-PJM8C
7LR67-WTXPA-KLUHV-GEK2E-QW4CK
EUYTH-3KWKL-PJMX7-XBCPW-9U2DD
THUV2-32HH7-6NMHN-PTX7Y-QQCTH
A4XV7-QP9JN-E7FCB-VQFRD-4NLKC
U2PWU-H7D9H-69T3B-JEYC2-3R2NG
7G2HE-JR8KL-ABB9D-Y7789-GLNFL
9DP6T-9AGWG-KWV33-9MPC8-JDCVF


android-x86 设置

1.兼容性问题

Android x86 默认不带houdini,运行纯ARM版会提示:

很抱歉,”xxxx”已停止运行

设置->应用兼容性->打开

终端模拟器

$ su
# enable_nativebridge


脚本会自动下载houdini.tgz并解压到相应位置


2.网络设置

网络设置为桥架模式

adb connect 192.168.56.101:5555
adb devices
adb -s 192.168.56.101:5555 root
adb -s 192.168.56.101:5555 shell


3.ADB安装app

adb install ***.apk

How to Fix PIN Errors After Restoring from TWRP Android Backups

ref:https://www.howtogeek.com/240657/how-to-fix-pin-errors-after-restoring-from-twrp-android-backups/

Making TWRP backups is a must if you’re going to be rooting and tweaking Android. But if your phone is encrypted, you may have some issues with your PIN or password lock after restoring from a backup. Here’s what’s going on.

If the backup you’re restoring uses the same PIN as your current system, everything should go swimmingly. However, if the system you’re restoring to uses a different PIN than the system you’re restoring from, you may run into some quirks. When you reboot your phone, it’ll ask you for a PIN, saying “PIN required when you restart device”. In some cases, you’ll have to enter your latest PIN when you boot, and your old PIN to get into your phone. In other cases, you may not be able to unlock your phone at all. But don’t panic: in both cases, this is easily fixable.

If Your Device Is Stuck Using Two PINs or Passwords

After restoring from backup, you may find that your device accepts two PINs: your most recent PIN at boot, and your old PIN (from the backup you restored) for unlocking the device. This isn’t a huge problem, but can be confusing since you need to remember both PINs. Thankfully, the solution is simple: Just reset your PIN in Android’s settings.

Head to Android’s Settings app and go to Security > Screen Lock. From there, tap on PIN or Password to choose a new PIN or password to lock your phone.

After doing so, that is the PIN or password you will use for everything–at boot and at the lock screen.

If Your Device Won’t Unlock At All

Here’s where things get really dicey. In some rarer cases, your most recent PIN will work at boot, but no PIN will work to unlock the screen–meaning you can’t access anything on your phone. Thankfully, this is fixable too–it just takes a few more steps.

First, boot back into TWRP’s recovery environment. It’ll likely ask you for a password–enter your most recent working PIN (the one you were using before you restored from backup). If you didn’t have a PIN, type in default_password. You’ll be greeted with the main TWRP window.

Then, head to Advanced > File Manager, and go to the /data/system folder. Scroll down and find the two files with  the .key extension. Delete both of them (by tapping on the file and then tapping the “Delete” button). Then, delete all the files containing the word locksettings.

So on my Nexus 5X, for example, I deleted the following files:

  • password.key
  • pattern.key
  • locksettings.db
  • locksettings.db-shm
  • locksettings.db-wal

Once you’ve deleted all the key and locksettings files, reboot your system. If it asks you to install SuperSU, choose “Do Not Install”.

You may be prompted for a PIN before your phone finishes booting. Once again, it should work with your most recent PIN–the one you were using before you restored from backup.

Once Android starts, your lock screen should appear, with no PIN or password prompt. Unlock your phone (yay!) and head to Android’s Settings. Scroll down and go to Security > Screen Lock. From there, you can choose a new PIN or password to lock your phone.

After doing so, that is the PIN or password you will use for everything from here on out.

goldendict

Android上好用的词典-GoldenDict

ref:http://www.jianshu.com/p/3bbdd2fd98c4


简介

GoldenDict是一款功能强大的开源词典应用,使用WebKit作为渲染核心,支持多种词典格式和基于MediaWiki引擎的网站,目前最新版本是1.0.1。GoldenDict 发布于 GNU GPLv3+ 许可之下,可运行于 Linux、Windows、Android平台上,更多关于它的详情可以查看官网,和Github地址。本文主要介绍GoldenDict在Android上的安装和使用方法。

下载安装

在Google Play中搜索GoldenDict,会看到有两个GoldenDict版本,其中FREE版本有限制最大可导入的词典为5本,其它的与收费版本差不多。当然因为GoldenDict是开源项目,所以如果大家资金充裕,可以选择够买收费版本,支持一下GoldenDict团队。

Google Play搜索

安装成功后,打开应用,我会看到如下提示,因为目前我们手机上还没有任何词典,下面我们就来导入自己喜欢的词典。

提示

导入词典

在SD卡的根目录上创建GoldenDict目录,如果手机没有SD卡,也可以在手机的内存根目录上创建GoldenDict目录。

然后前往资源网站上下载自己需要的词典。因为GoldenDict可以支持很多种格式的词典,大家也可以自己去寻找自己喜欢的字典资源导入。这里我们下载一个:《牛津英汉双解》。

下载资源

下载完成后,解压词典文件夹到刚刚创建的GoldenDict目录下,你可以使用电脑连接手机的方式,或者直接使用手机上的文件管理器完成以上步骤。

此时再打开GoldenDict应用,就会发现它识别出了刚刚我们拷贝的词典。

识别词典

点击Proceed就完成了这本词典的导入了。你可以选择自己任意喜欢的词典再加入,但free版本最大限制是5本。

使用简介

查询

goldendict下优质词典简介及安装

ref:https://blog.yuanbin.me/posts/2013/01/goldendictxia-san-da-you-zhi-ci-ku-shi-yong-xiao-ji.html

使用Arch Linux一年以来,如果要问自己最为中意的词典程序是? 当然是Goldendict啦!想详细了解这款瑞士军刀的请猛戳这里.

以前在Win下都是用的lingoes, 感觉还不错,词典库很全,中英双解的词典很多,其它诸如取词, 整句翻译的功能都还能凑合着用(其实是用的第三方引擎),总之这个对于天朝大众还是很不错的啦!一年前转到Arch Linux下就一直在找Linux下比较好用的词典程序和词典,综合来看,Goldendict确实是上上之选(可以认为是stardict的升级版么?),支持的词典格式比较典型的有dsl bgl stardict...,总之是够用了啦!不过话说回来,选择过多有时候却等于没有选择,星际译王的词典确实很多,但试用了一些,大多质量不是很高,幸好使用Google找到了这么一个帖子-Goldendict及其词典详述, RT,楼主实在是很用心,几乎把每个细节都讲到了,对于刚使用goldendict筒子们无疑是帮了一个大大的忙,不过帖子中提供的词典链接基本都已经坏掉了,而且个人觉得对于词典使用者来说,那些步骤也确实太麻烦了,下边我就一些优质的词典安装使用做简要的说明,跟着我这个来下载完后基本就能用了,Troubleshoot部分就一些细节再做一丁点补充。「前人种树,后人乘凉」呼呼~~

goldendict安装

只要你使用的发行版不是过于小众,应该都可以在软件源找到goldendict这款软件。

  • Debian/Ubuntu sudo apt-get install goldendict
  • Arch sudo pacman -S goldendict

Oops…如果实在是没有,解决方案有两个,一是果断换发行版!!二是前往github自行编译。 自从爪机换成Android后自己用的主力词典软件也是goldendict, 将下边带词库文件复制到指定目录下即可使用,非常棒。

词典下载及使用方法简介

  1. Oxford Advanced Learner’s Dictionary 8th edition(En-En)-牛津高阶词典(英英)第8版,含图片及英式发音和美式发音
  2. Merriam-Webster’s Collegiate 11th edition(En-En)-韦氏大学词典(英英)第11版,含图片及发音
  3. Longman DOCE5-Longman Dictinary of Contemporary English 5th edition(En-En)-朗文当代第五版英英词典,含发音和图片,大部分例句也带有朗读,很强悍!!!
  4. Longman Pronunciation Dictionary 3rd edition(En-En)-朗文发声辞典第三版,词典中有英音、美音,并对于“多音”的词,配有preference poll图表,即不同的发音在不同地区、不同年龄层里所占的比例。不得不说,这个碉堡了!!!
  5. Longman DOCE5 Extras(En-En)-不包含单词发音和图片,但是包含了该词汇的各种搭配,和牛津搭配词典类似
  6. 牛津高阶英汉双解 第四版(En-zh_CN)-英汉双解,我想这个对于国人是必不可少的吧?bgl的格式,排版很美观,无发音
  7. en_US_1.0.zip-词形匹配,查词时会自动将复数或者其他形式转换为标准形式

以上6部词典应该是完全够用了,前3部英英词典任选一部即可。以上的文件放在我的百度云网盘中,需要的请移步这里,将词典下载至你想要放的任何位置(直接使用网页打包下载可能会不稳定而下载失败,极其不推荐这种方式下载,做好心理准备…),再到goldendict下设置词典目录即可,重新扫描->大功告成!
之前用Dropbox分享过,最近Dropbox老是提示我流量过多而禁用分享,所以转向了不限流量的百度云,同时也方便国内用户下载。最近发现有其他人保存了我发布过的Dropbox分享,下载时选择「复制到我的Dropbox」就不会给分享人造成流量过多而禁用分享的问题了,而且通过同步下载的方式也稳定的多。

词典下载链接

  • 百度云, 『保存到网盘』,尽量不要使用网页下载 ,下载不稳定并且容易损坏原文件。
  • Dropbox(流量太大长期被Dropbox关闭分享请使用以下分流链接), then click the Add to my Dropbox, 中文的话点击『复制到我的Dropbox』,尽量不要使用网页下载,一来下载不稳定并且容易损坏原文件,二来会增加Dropbox的流量而被暂时禁掉掉分享链接!!我用了几年前注册过的Dropbox帐号对以上词典进行分流,下载方式同上,建议通过『复制到我的Dropbox』方式下载。如果你还没有Dropbox帐号的话不妨猛击我的Dropbox推广链接
  1. En-En_Longman_DOCE5 and Longman DOCE5 Extras(En-En)
  2. En-En_Longman_Pronunciation3
  3. En-En_Merriam_Webster11
  4. En-En_OALD8
  5. En-zh_CN_OALD4
  6. en_US_1.0.zip

词形匹配

很多人抱怨 Goldendict 取词 “books” 居然查不到,它不会自己转换成 “book”,那不过是你没有正确设置而已,事实上这一点 Goldendict 利用构词法规则库可以做得极其强大。编辑-》词典-》词典来源-》构词法规则库可以设置其所在目录。英语构词法规则库到这里下载,注意需要解压缩,英文版软件则通过Edit->Dictionaries->Morphology设置构词法规则库所在文件夹。

http://forum.ubuntu.org.cn/viewtopic.php?f=95&t=265588 功能篇

各词典使用截图

文件目录树

.dictionary
├── [4.0K] En-En_Longman_DOCE5
│ ├── [2.2K] En-En-Longman_DOCE5.ann
│ ├── [1.4K] En-En-Longman_DOCE5.bmp
│ ├── [ 17M] En-En-Longman_DOCE5.dsl.dz
│ ├── [1.3G] En-En-Longman_DOCE5.dsl.files.zip
│ ├── [ 854] En-En-Longman_DOCE5_Extras.ann
│ ├── [1.4K] En-En-Longman_DOCE5_Extras.bmp
│ └── [ 53M] En-En-Longman_DOCE5_Extras.dsl.dz
├── [4.0K] En-En_Longman-Pronunciation
│ ├── [ 277] En-En-Longman_Pronunciation_abrv.dsl.dz
│ ├── [ 848] En-En-Longman_Pronunciation.ann
│ ├── [1.4K] En-En-Longman_Pronunciation.bmp
│ ├── [3.3M] En-En-Longman_Pronunciation.dsl.dz
│ └── [566M] En-En-Longman_Pronunciation.dsl.dz.files.zip
├── [4.0K] En-En_MW11
│ ├── [ 850] En-En-MWCollegiate11.ann
│ ├── [ 980] En-En-MWCollegiate11.bmp
│ ├── [ 13M] En-En-MWCollegiate11.dsl.dz
│ └── [570M] En-En-MWCollegiate11.dsl.dz.files.zip
├── [4.0K] En-En_OALD8
│ ├── [ 290] En-En_Oxford Advanced Learners Dictionary_abrv.dsl.dz
│ ├── [3.8K] En-En_Oxford Advanced Learners Dictionary.ann
│ ├── [ 978] En-En_Oxford Advanced Learners Dictionary.bmp
│ ├── [ 23M] En-En_Oxford Advanced Learners Dictionary.dsl.dz
│ └── [562M] En-En_Oxford Advanced Learners Dictionary.dsl.dz.files.zip
└── [4.0K] En-zh_CN_OALD4
│ └── [ 11M] Oxford_Advanced_Learner_English-Chinese_Dictionary-4th.bgl

5 directories, 22 files

Troubleshoot-故障排除

网上大多给出的是dsl及音频图片的原始格式,我这里已经对dsl进行了压缩处理(使用dictzip进行压缩,Arch Linux下安装dictd即可使用dictzip命令),音频和图片的zip文档是从115上下下来的,如果对音频图片不在乎的话就不用下…dsl.dz.files.zip这些庞然大物了。我最开始下的都是dsl和音频图片的源格式,可折腾死我了, 几十万个音频用zip压缩起来估计得要个一个星期左右, 压缩刚开始的时候速度还可以,到后头就变成了蜗牛,实在是受不了,放在/tmp下也没见得好很多,其它诸如提升进程优先级的方法也试过,除了使CPU的风扇呼呼地吹之外也没见有什么加速的效果,最后果断放弃之,皇天不负有心人,在Google 搜索框内En-En site:115.com总算发现了我要的这些文档。不过下下来后比较了一下,发现网络上的那些zip文档中包含的音频文件总比我下的原始文件数少了那么几个,10多万个少那么一两个问题也不大啦!凑合着用吧!

zip …提示「参数列表过多」或者是压缩速度过慢
若你不小心下载到了.rar的音频和图片文件,结果解压缩后却发现文件夹下有100,000+个音频文件等着你… 如果你真有耐心,那就按下边的步骤来做吧。
压缩过程不要在图形界面下做!!!100000+个文件会把你的CPU和内存拖垮的!!!

  • 压缩速度过慢.

将压缩得到的文件置于/tmp文件夹下,Arch Linux下此文件夹利用ram和swap作为介质,对硬盘的损伤会小很多,速度也会快很多。
将图片音频解压到/tmp下某一文件夹下(这一步可以在图形界面下做),解压后得到的文件像下边的这个样子:
.
├── 12ste01v.wav
├── 9keesh01.wav
├── 9keros01.wav
├── 9ketog01.wav
├── 9khalk01.wav
├── 9khalk02.wav

  • 参数列表过多.

进入音频或图片所在文件夹.
find . -name "*" -print | zip -9 /tmp/En-En-your dictionary.dsl.dz.files.zip -@
另外一种方法就是
for d in ./\*. ; do zip -9 En-En-your-dictionary.dsl.files.zip "$d" ; done

不知为何,我用第二种方法的时候压缩速度实在是太慢,用第一种方法则很快,网友们可自行测试一下。

  • 找不到dictzip这个命令.

看网上说Ubuntu下安装这个软件包即可,Arch Linux下则安装dictd这个包,其它发行版搜索下应该也能找到

  • 使用goldendict是总是显示加载中.

有可能是你下的词典不行,我当时下的一个牛津高阶英汉双解bgl格式的可把我坑死了,最后终于找到了上文中那个相对比较完美的版本(除了音标不完整)。

  • goldendict使用维基百科不显示图片-not display pictures while using Wikipedia

自行到github编译goldendict最新版-go to https://github.com/goldendict/goldendict. The readme file will tell you how to compile from the source. Arch Linux下只需使用AUR中的git版本即可,大爱Arch!^_^

  • 版权问题

以上词典均由网络收集…

音标问题

1.音标可用文件:

https://www.douban.com/note/308047059/

GoldenDict支持CSS,文件名为article-style.css,用记事本编辑如下:
article-style.css:
body {
font-family: “Lucida Sans Unicode”,Tahoma, Verdana, sans-serif;
}

在Linux下,放在~/.goldendict
在Windows下,放在%APPDATA%\GoldenDict
如果是便携版的,放在portable

=====

哪些字体包含国际音标呢?
在微软的Windows与Office的2000或以上版本中分别带有Lucida Sans Unicode和Arial Unicode MS两种字体(以下分别简称LSU和AUM),它们包含了1993年的《国际音标表》上所有音标和附加符号(逾两百个)。


2.音标乱码

今天朋友问我如何使用安卓版的Goldendict加载 Oxford Advanced Learner’s English-Chinese Dictionary.bgl 并使其音标部分显示正常。( P( u9 b& t7 `* a8 I1 K% [7 u( }
正常情况下,桌面版安装了 金山音标字体 后就可以了,然而安卓版需要DIY!只需要稍微自定义一下GD全局的CSS文件即可。

 
(一)首先需要知道词典文件里固定的字体名称:
使用桌面版GD,加载这个.BGL词典,查询任意词条,【右键】→【审查元素】→点击到字体部分所在的HTML代码→得知字体名称是:Kingsoft Phonetic Plain

(二)自定义安卓版GD的CSS,添加字体信息:
 kingsoft_phonetic_ue.ttf 复制到 sdcard/GoldenDict/.config/ 目录夹下,! M! L2 H  E; b1 A. _
在同样目录下,新建 article-style.css,编辑,粘贴以下我们这儿需要的自定义字体的代码:

@font-face{font-family:"Kingsoft Phonetic Plain";font-weight:normal;font-style:normal;src: url('file:///sdcard/GoldenDict/.config/kingsoft_phonetic_ue.ttf');}

(三)重新打开GD,音标部分显示正常了!

kingsoft_phonetic_ue.ttf字体下载

https://github.com/liuyug/myfont/tree/master/.fonts

https://github.com/sbw983/myfont9


Android 5/6/7/7.1.x 去除网络感叹号方法

貌似自从Android 5.0 Lollipop开始,Google就增加了一个Portal Server门户服务器的连通性测试,大意是为了在连接到需要验证的Public Wi-Fi时,能根据连通测试的情况自动弹出Wi-Fi登陆提示页面,但是默认的地址是 [国内不存在的] gstatic.com 的,鉴于国内的奇葩环境,不管Wi-Fi是不是好的,都会被认为网络是不通的显示一个感叹号提示(Android 7.0 Nougat改成了小叉叉)……

注意:本文提到的方法都无需root,但是需要adb工具并开启开发者选项。

Android 5.0 Lollipop & Android 6.0 Marshmallow的解决方法

在Android 5.0 Lollipop & Android 6.0 Marshmallow时,根据小狐狸分析,可以用以下两个方法解决

    • 方法一:直接禁用Portal Server的连通性测试

在开启了开发者选项的情况下,连接电脑,安装最新版的adb工具,然后执行以下命令:

然后飞行模式一下,就没有了,但是有个弊端,就是如果你连接公共Wifi需要验证的时候,会发现不会自动弹出验证网页,需要自己打开浏览器访问任意网页才行。

    • 方法二:更改默认的Portal Server地址

网上有一些热心人士提供了在国内可正常连接的Portal Server,包括小狐狸v2exg.cn等,我个人比较喜欢g.cn的,同样在adb下输入以下命令可以达到修改Portal Server的目的:

方法二我一直都在用,但是直到Android 7 Nougat这个办法就失效了……如果你用了方法一,应该不用往下看,以下都是基于方法二的调整。

Android 7.0 Nougat的解决方法

这个时候,之前的方法失效了,于是遍寻网上,后来有人发现是验证方法改成HTTPS了,而之前是HTTP的,于是热心人士的服务器纷纷失效了,因此v2ex还升级了之前提供的服务,开出了一个子域名专门做Portal Server,并同时提供HTTP和HTTPS两种连接方式。同样可用的热心人士服务器有Google.cn …… 如果你之前用的就是v2ex的,那么在v2升级后,你就检测就会恢复了,不需要再修改设置。

在Android 7 Nougat仍然可以通过禁用检测的方式来解决这个问题,但我更喜欢无损解决,所以,把上面方法二的服务器换一下就行:

Android 7.1.x Nougat的解决方法

ref:http://bbs.gfan.com/android-8892832-1-1.html

在android 7.1.2中,以前所用的感叹号处理方法不再有效,看了看代码,有两种方式可以消除感叹号

1.直接禁用网络验证检测,使用命令:
adb shell settings put global captive_portal_mode 0

2.修改网络验证的HTTPS URL(推荐):
adb shell settings put global captive_portal_https_url https://connectivitycheck.gstatic.com/generate_204

PS: connectivitycheck.gstatic.com 解析得到的IP在国内,不用哪个啥,android O应该也可以用这两种处理(没测试)


以下无效:

请执行以下命令


1
2
3
4
5
adb shell “settings put global captive_portal_https_url https://www.google.cn/generate_204”
adb shell “settings put global captive_portal_http_url http://www.google.cn/generate_204”
adb shell “settings put global captive_portal_https_url https://captive.v2ex.co/generate_204”
adb shell “settings put global captive_portal_http_url http://captive.v2ex.co/generate_204”

目前来看,我刚升级到7.1.1的Nexus 5x是解决了这个问题了,不知道下次版本升级又会发生什么…… 以上的操作,如果要恢复出厂原始设置,可以执行以下命令:


1
2
3
4
adb shell “settings delete global captive_portal_server”
adb shell “settings delete global captive_portal_https_url”
adb shell “settings delete global captive_portal_http_url”
adb shell “settings put global captive_portal_detection_enabled 1”

P.S:个人极力推荐有各种科学上网需求的童鞋,完全可以买一个Google Project Fi的SIM卡来日常用,天然科学上网,自带米国手机号,无障碍平滑激活Google Now/Location等服务,等有空写写Fi的使用体会。

-EOF-

——————–
引用参考:

  1. 狐狸的小小窝:关于 android 5.0 网络图标上的感叹号及其解决办法
  2. V2EX:关于 V2EX 提供的 Android Captive Portal Server 地址的更新
  3. V2EX:关于 Android 7.0 的 global captive_server_use_https 设置的默认值
  4. V2EX:可否加入 generate_204 ,方便 Android L 消除叹号。
  5. 私家折腾笔记:Android 7.1.1 去除网络叉号

51-android

ref:

https://github.com/snowdream/51-android


##Introduction If you’re developing on Ubuntu Linux, you need to add a udev rules file that contains a USB configuration for each type of device you want to use for development. In the rules file, each device manufacturer is identified by a unique vendor ID, as specified by the ATTR{idVendor} property.

For more infomation,please visit
http://developer.android.com/tools/device.html.
http://www.linux-usb.org/usb.ids

##System requirements Ubuntu,Fedora or other linux systems.

##Install
1.Open the console to copy the file “51-android.rules” to “/etc/udev/rules.d/51-android.rules” by executing the command below. To Achieve it,you should be sure that you have the root permission.

sudo curl --create-dirs -L -o /etc/udev/rules.d/51-android.rules -O -L https://raw.githubusercontent.com/snowdream/51-android/master/51-android.rules

2.To give it appropriate permissions next execute the command:

sudo chmod a+r /etc/udev/rules.d/51-android.rules

3.Then execute:

sudo service udev restart

4.When plugged in over USB, can verify that your device is connected by executing adb devices from your SDK platform-tools/ directory. If connected, you’ll see the device name listed as a “device.”

##License

Copyright (C) 2014 Snowdream Mobile <[email protected]>

Licensed under the Apache License, Version 2.0 (the "License");
you may not use this file except in compliance with the License.
You may obtain a copy of the License at

        http://www.apache.org/licenses/LICENSE-2.0

Unless required by applicable law or agreed to in writing, software
distributed under the License is distributed on an "AS IS" BASIS,
WITHOUT WARRANTIES OR CONDITIONS OF ANY KIND, either express or implied.
See the License for the specific language governing permissions and
limitations under the License.

Google提供Fastboot和ADB单独下载服务

原文:http://www.cnbeta.com/articles/574639.htm

在许多Android用户多次呼吁之后,Google终于将ADB和Fastboot作为单独的文件提供给用户下载。以前这些文件只包含在大尺寸的Android SDK或Android Studio当中提供给用户,现在这种变化意味着它们现在比以往更快,更容易执行和侧载。

多年来,为了帮助克服只为2个小文件,下载大量文件的问题,第三方网站往往单独提供这2个文件,但出于安全考虑,许多人更喜欢使用官方工具。通过让ADB和Fastboot这2个软件更容易获得,Google有效地提升了解锁手机和刷机用户数量。

以下是ADB和Fastboot的谷歌官方下载链接:

ADB和Fastboot for Windows

https://dl.google.com/android/repository/platform-tools-latest-windows.zip

ADB和Fastboot for Mac

https://dl.google.com/android/repository/platform-tools-latest-darwin.zip

ADB和Fastboot for Linux

https://dl.google.com/android/repository/platform-tools-latest-linux.zip

由于这些是直接的Google链接,用户可以确保下载不仅是官方的,而且将始终能够获得最新版本的ADB和Fastboot。

[GUIDE] Enable App Ops (Application Permissions)

原文:http://forum.xda-developers.com/verizon-galaxy-s6/general/guide-enable-app-ops-application-t3176638


While looking around at the decompiled SecSettings2.apk, I noticed that all of the App Ops (application permissions) stuff was still present. So, I decided to look for a way to enable the Settings menu option for Application Permissions.

The xml files all seemed to have the entries required to display the option, but the smali code was preventing it.

Note that there are apps in the store that will give you this feature, but this method doesn’t require an additional app and it uses the built-in settings menus.

I have not tested every permission, but I did disabled “location” for several apps and that worked perfectly.

This is an easy mod if you know how to decompile/recompile.

There are 2 ways to implement the Application Permissions menu option:

Method 1 (requires deodexed app and smali edit)

  1. Decompile the deodexed SecSettings2.apk.
  2. In the smali folder, navigate to comandroidsettingsLockscreenMenuSettings.smali
  3. Do a search for the following line:
    Code:
    iget-object v14, v0, Lcom/android/settings/LockscreenMenuSettings;->mAppOpsSettings:Landroid/preference/Preference;
  4. Just after the first instance of that code, you will see:
    Code:
    if-eqz v14, :cond_d
  5. Change it to:
    Code:
    if-nez v14, :cond_d
  6. Save and recompile.
  7. You will find the “Application Permissions” menu under the “Lock screen and Security” settings menu (screenshot #1).


Method 2 (easier – can be either odexed or deodexed)

  1. Decompile SecSettings2.apk
  2. Open the res/xml/applications_settings_vzw.xml
  3. Insert the following code on a line right above “PreferenceCategory” near the bottom:
    Code:
    <PreferenceScreen android:icon="@drawable/st_application_ic_application_permission" android:title="@string/app_ops_settings" android:key="app_ops_settings" android:fragment="com.android.settings.applications.AppOpsSummary" />
  4. Save and recompile.
  5. You will find the “Application Permissions” menu under the “Applications” settings menu. (screenshot #2)

Disclaimer: This is intended mainly for rom devs to use, but if you like making your own mods, then feel free to give it a try. I take no responsibility for any modifications you make to your device. Always ensure that you have the required files to restore if something goes wrong.